Devices

Here you will find a list of all previously created and saved Devices Name and Location. Each Device will have its corresponding Name, Details and Creation Time displayed for easy reference.
On the right side of each Devices entry, there is a settings dropdown that provides additional options for managing the Devices. The options available in the settings dropdown typically include View, Edit, Delete, Clone device, Upload, View Uploaded File and View Anomalies .


These options provide flexibility and control for managing devices within the OneSense platform. They allow you to view device details, make edits, delete devices, clone configurations, upload files, review uploaded files, and investigate any anomalies associated with the device.
View
In here the options such as "Security, Device details, Telemetry, Logs, Settings, Files, Deployement History" that provide more detailed information and functionalities related to the selected device.
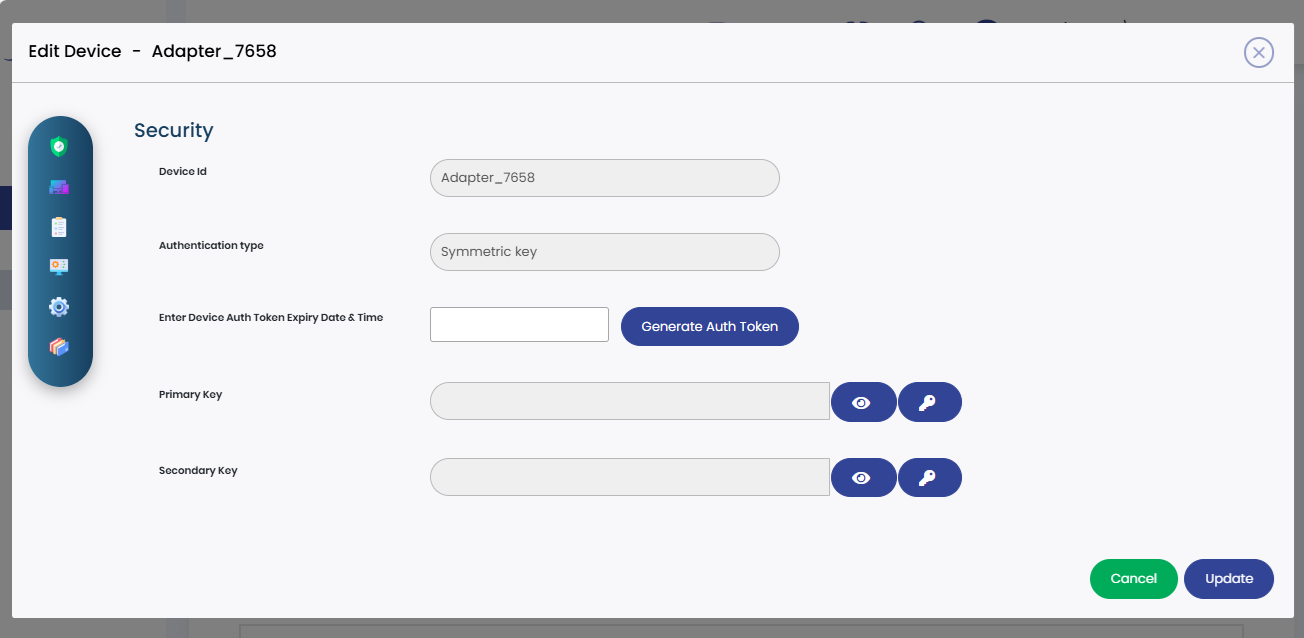
Security
The "Security" allows you to access and manage the security settings and permissions associated with the device. You can configure authentication, authorization, and other security-related aspects to ensure the device's data and functionalities are protected. In the security settings of the device, you will find a field to specify the authentication type. This field allows you to define the method of authentication used to secure the device. In the case you mentioned, you would select the "Symmetric Key" authentication type.
It's for the security mechanism where both the device and the server share a common secret key. This key is used to authenticate the device and establish a secure connection between the device and the server. By specifying the symmetric key in the authentication field, you ensure that only devices with the correct key can establish a connection and communicate with the server.
Using primary key and secondary key authentication adds an extra layer of security as it requires knowledge of the shared key to access and communicate with the device. This prevents unauthorized users from misusing or gaining access to the device's functionalities or data.By inputting the symmetric key in the authentication field, you establish a secure and private communication channel between the device and the server, ensuring that no outside users can use or misuse the device without the knowledge of the shared key.

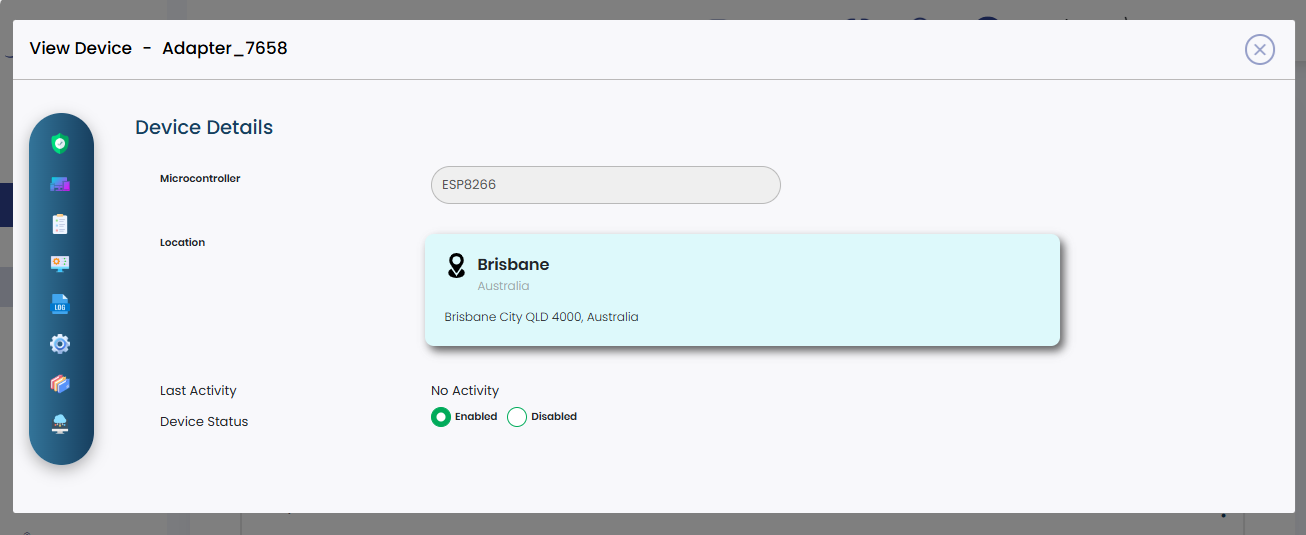
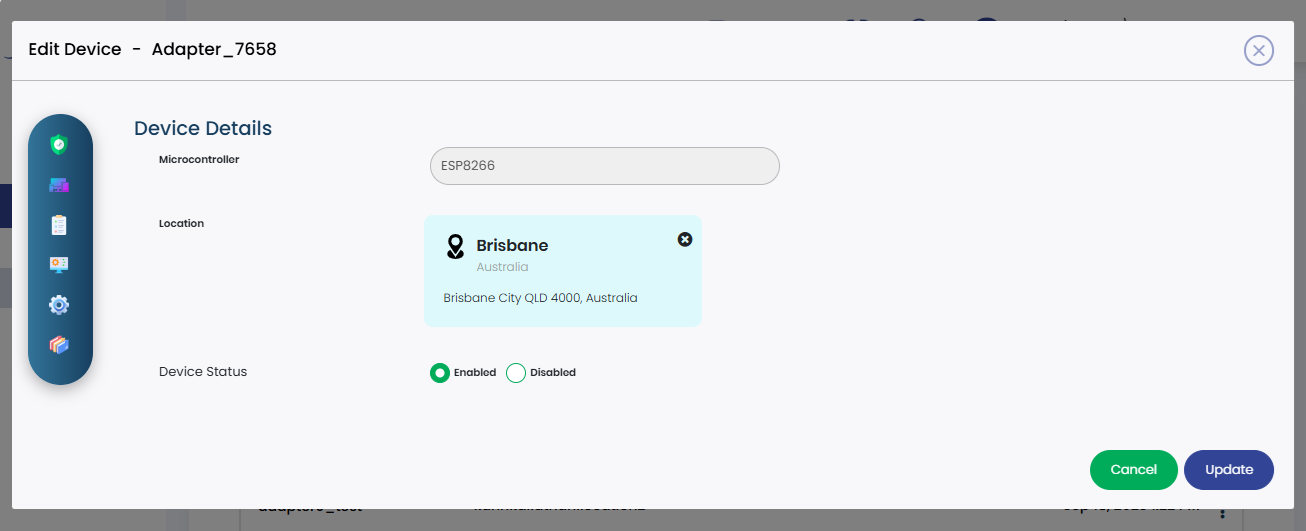
Device Details
These device details help provide a comprehensive overview of the selected device, including information about its hardware, software, physical location, and GPS data if applicable. It allows users to understand the technical specifications, location, and firmware-related information of the device within the OneSense platform.
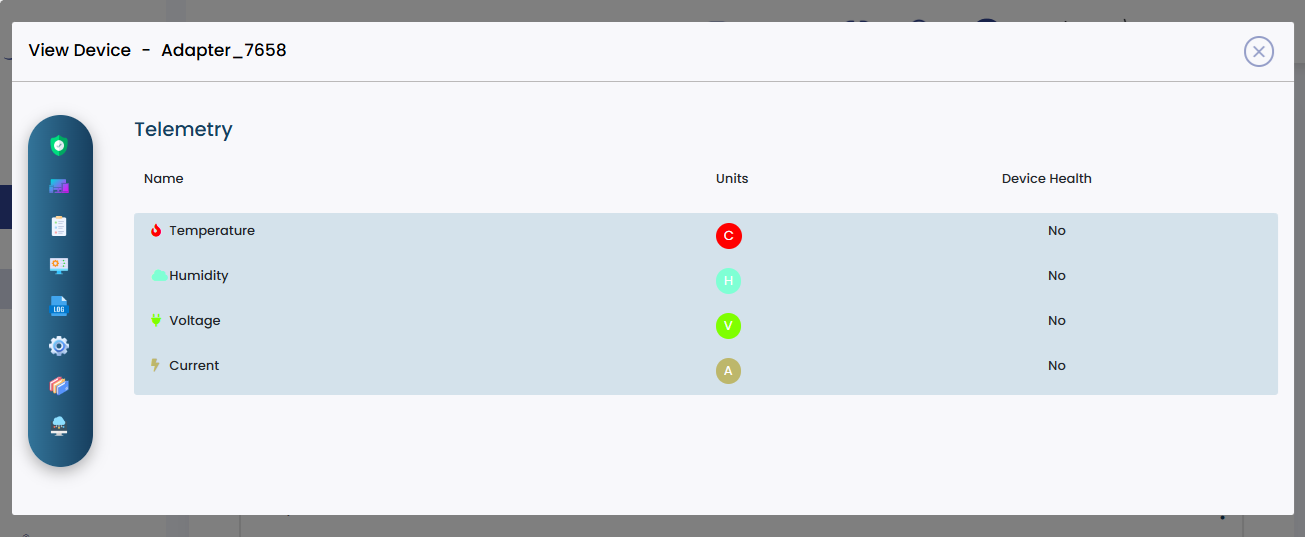
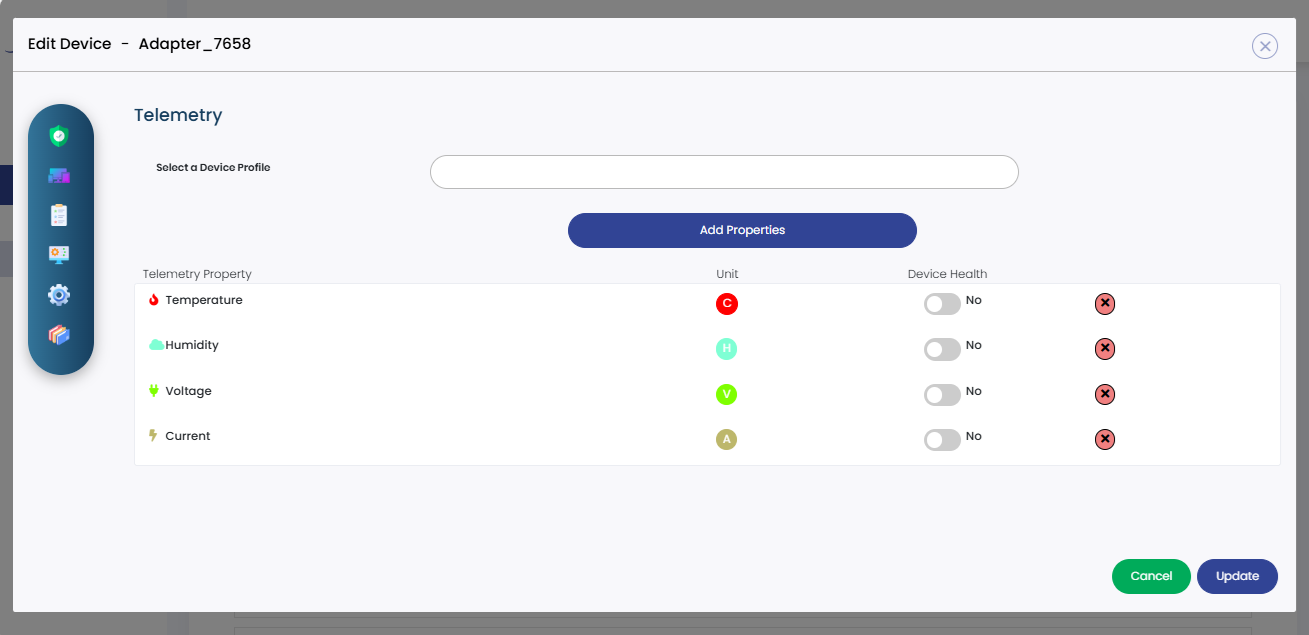
Telemetry
In the telemetry column, you will find the added parameters of the device along with their respective units of measurement. These parameters represent the specific data points or measurements that the device is capturing and transmitting.
By monitoring the telemetry status, you can understand the device's health and performance. The telemetry data provides insights into the device's operation, measurements, and environmental conditions. It helps you assess the device's functionality, detect any abnormalities or anomalies, and ensure that it is operating within the expected range.
For example, if the device is monitoring temperature, the telemetry column may display the parameter "Temperature" with the unit "°C" (Celsius). By reviewing the telemetry status for temperature, you can determine if the temperature readings are within the desired range or if any deviations or issues need attention.
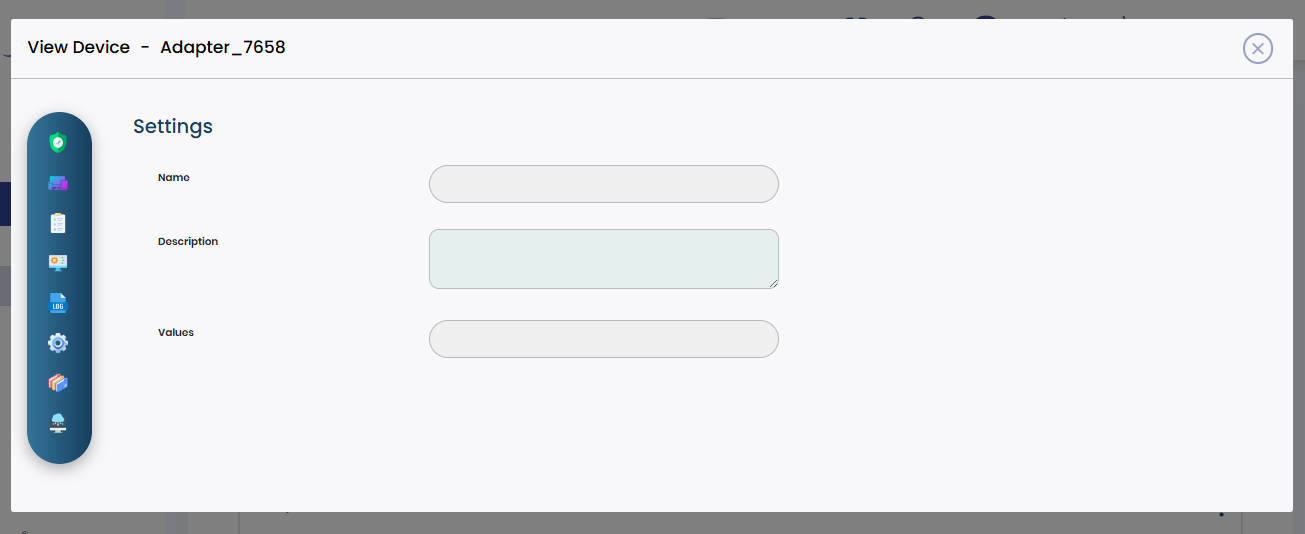
Settings
Within the settings dropdown, you will find the device name, description, and values. Device Name refers to the name or identifier assigned to the device.
It helps in identifying the device among others and provides a unique reference for management purposes.
In the Description field provides additional information about the device, such as its purpose, specifications, or any other relevant details that provide context and clarity. And the Values section displays the current settings or configurations of the device. It includes the specific values assigned to various parameters or properties associated with the device.
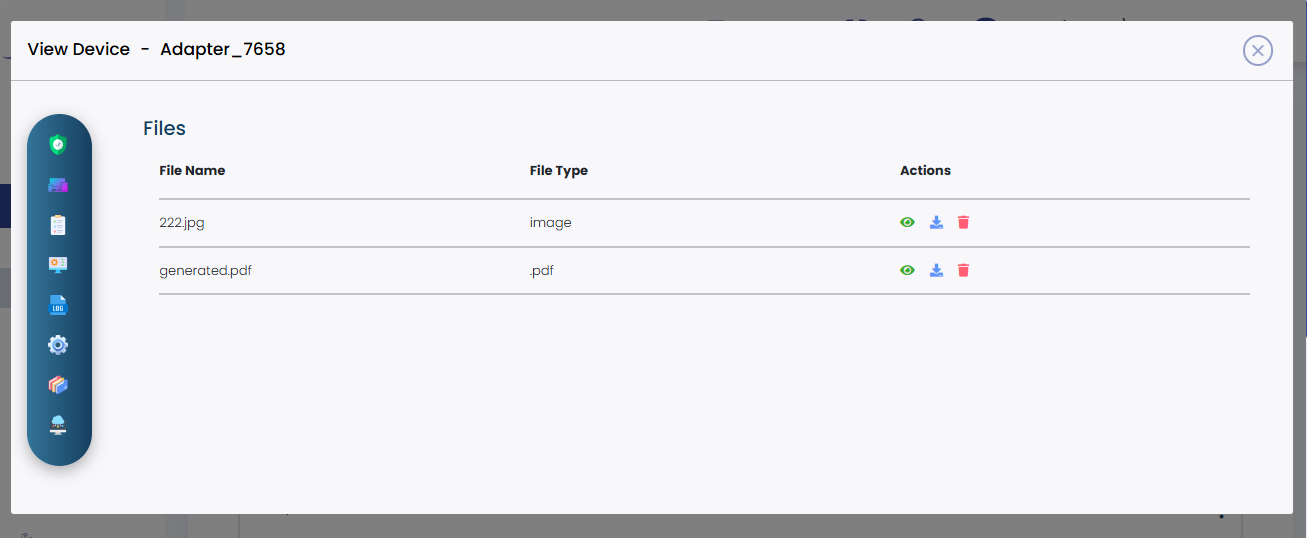
Files
Here you will find options to view the file name, file type, and actions related to the files associated with the device.
File Name displays the names of the files that are associated with the device. It helps you easily identify and locate specific files.
File Type provides information about the type or format of each file. It indicates whether the file is a document, image, spreadsheet, or any other supported file format. And Actions contains options or actions related to the files. These actions may include viewing the file, downloading it, and deleting it.
Edit
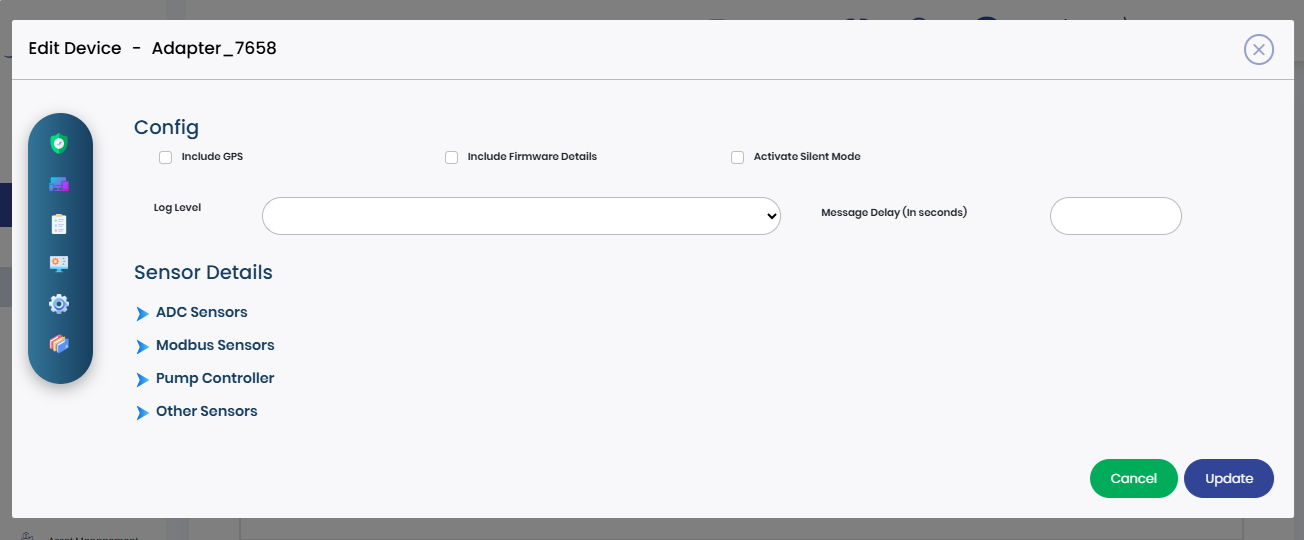
Here you have the ability to modify various aspects of the device details. This includes security, device details, telemetry, config, node, settings, and files.
To add new properties, Click on the "Add Properties" button within the Telemetry section. Once you have filled in the required Telemetry property and it's corresponding unit, click on the "Save" button to save the added property.
The new property will be added to the device's telemetry data, allowing you to track and monitor this additional information. Remember to save the changes after adding the new properties to ensure that they are successfully incorporated into the device's telemetry data.
To remove an added parameter from the telemetry data, Look for a cross button or delete icon associated with that specific parameter.Click on the cross button or delete icon corresponding to the parameter you wish to remove. By clicking on the cross button or delete icon, you can remove the unwanted parameter from the telemetry data. This helps in decluttering and managing the data by removing any unnecessary or obsolete parameters.
Create New Devices
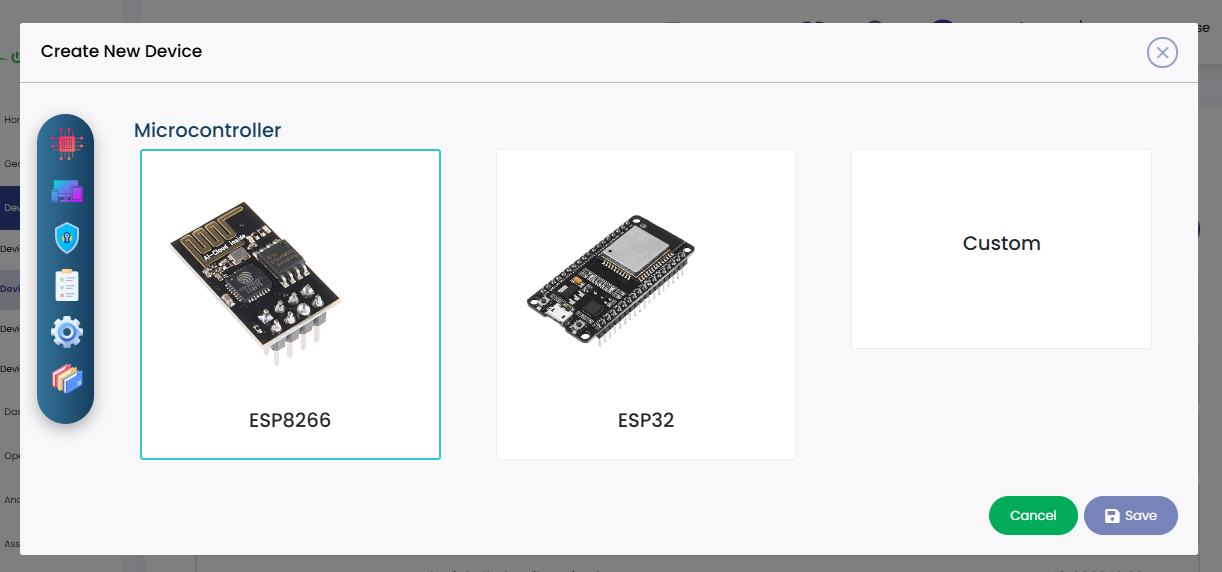
Click on the "+ Create New Devices" button located at the top of the window. This action will open the new device creation form.
Select the microcontroller or hardware platform used for the new device.
- Enter a unique "Device ID" to identify the new device.
- Specify the "Location" where the device is installed or deployed.
- Select a device profile that defines the parameters and units to be monitored by the device.
- Optionally, add new properties and their units to the device profile.
- Enter the name, description, and corresponding values for the device's settings as needed.
- Upload any relevant files or documentation related to the new device.
Once you have filled in all the necessary details for the new device, review the information to ensure its accuracy. Click the "Save" button, usually located at the bottom to create the new device and save its details in the OneSense platform.
Now you can successfully create a new device and activated, and store its information in the system. The new device will now be available for monitoring, management, and data collection within the OneSense platform.
To View the Device Dashboard
Click on the particular device listed under the "Device Name" column that you want to view the dashboard details for.
Once you click on the device, the platform will display the Device Dashboard details, including telemetry data and the device's location and images.
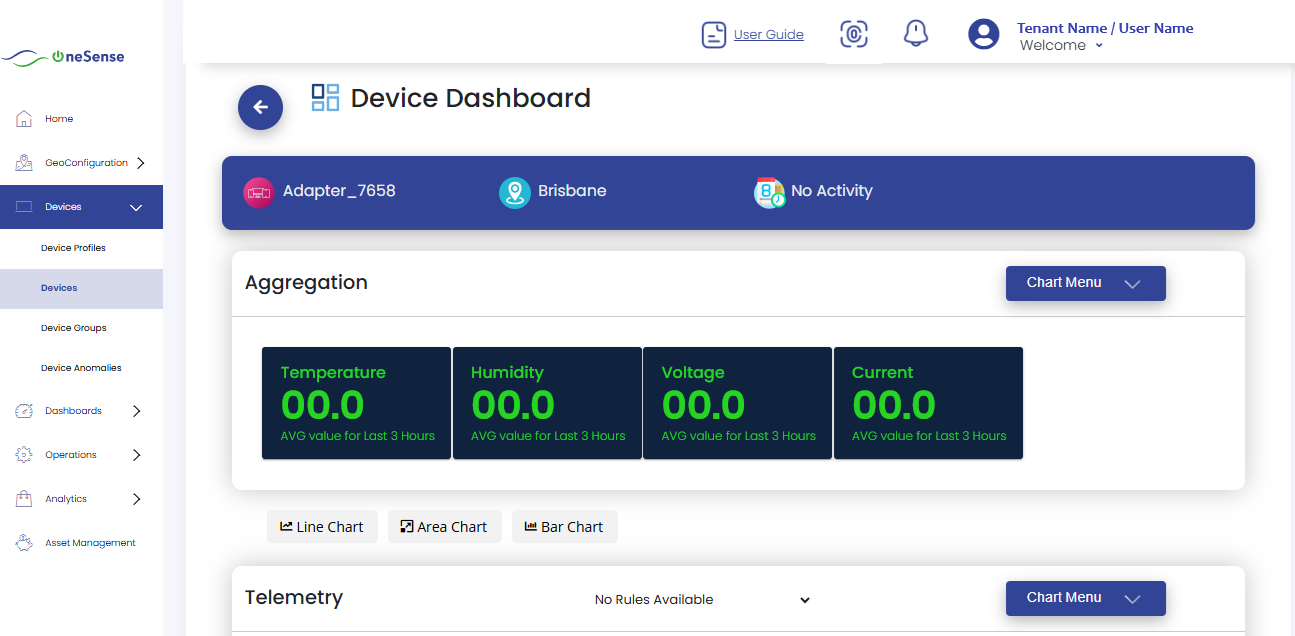
Click on "Avg" on the aggrigation side, choose the time period you want to view the telemetry and other details for. For example, you can select a specific time range, such as an hour.
You will be able to view the average telemetry values and other relevant details for the chosen time hour.

You will see the telemetry data visualized in a graph format.
Choose the Telemetry from the given list of available telemetry data, select the specific telemetry parameter you want to view in the graph. For example, you may choose temperature, humidity, Enclosure temperature, etc.
Once you select the telemetry parameter, the graph will automatically update to display the data for the chosen telemetry. The graph will represent the variation of the selected telemetry over the specified time period.
Here are some Onesense Devices
1. Remote Power Monitor (Development Name: PCB-1)
PCB-1 is a power monitoring plug with a piggy-back socket that will accept a 3-pin mains plug.
PCB-1 will monitor the voltage and current being delivered to the attached device and can report the data to the OneSense platform. PCB-1 includes the ability to turn the attached device ON or OFF using commands sent from OneSense. PCB-1 can be programmed to send data at predetermined intervals and report variations in current consumption that could indicate a pump overload or dry-running situation.
2. Remote Management Device (Development Name: PCB-2)
PCB-2 is an advance control and interface device that includes the functions of PCB-1 plus the ability to manage a series of external devices via an RS-485 interface. Managed devices can include pump controllers, WiWos, Digital pH, Turbidity, or Flow sensors, etc.
PCB-2 can also monitor multiple analog sensors, pulse inputs, and switch contacts These inputs can be applied to temperature measurement, level measurements with floats or pressure transducers, security applications include gates, doors, and lighting, etc.
The device can report data to the OneSense platform via GPRS or Wi-Fi and includes a solar battery management system for remote monitoring applications
3. Doppler Flow Meter (Development Name: Flow Meter)
The Doppler Flow Meter simultaneously measures water depth and velocity to calculate the water flow past a fixed point. The device can be programmed with the water channel’s cross-sectional profile to allow flow measurements to be calculated in a variety of channel shapes and sizes, including partially full pipes. The flow meter is fitted to the bottom of a channel or pipe and is connected to the Remote Management Device which provides electrical power to the flow meter and transmits the meter’s flow data to the OneSense platform.
4. Cold Chain Temperature and Humidity Sensor (Development Name: Transport Sensor)
The transport sensor is a small battery powered device intended for Cold Chain Logistics monitoring. The device will monitor its environment and automatically report the data to the OneSense platform via a OneSense Relay Hub. The sensor can be programmed to issue alert if the temperature or humidity exceed desired levels.
5. Door and Cover Position Sensor (Development Name: Cover Sensor)
The door/cover sensor is a versatile device designed to monitor the output state of a pair of Hall Effect devices. The first Hall Device can be positioned to detect the opening and closing of a door or the status of a locking mechanism while the second can detect the presence of a cover or lid etc.
When a lock is opened or a cover removed, the sensor will report the change-of-state to the OneSense platform via a OneSense Relay Hub.
The sensor can be used in a variety of applications from monitoring a manhole cover to a refrigerator, or a control room door, etc.
6. OneSense Relay Hub (Development Name: Hub)
The OneSense Relay Hub receives data from the OneSense sensors and relays it to the OneSense platform.
Two versions of the Hub are available: