Snowflake Rules
Prerequisite Setup

Before You Begin: First configure your Snowflake credentials in the Settings section:
1. Navigate to Administration → Settings
2. Select Vaults
3. Add your sfUser and sfPassword credentials
Exporting Devices Data to Snowflake
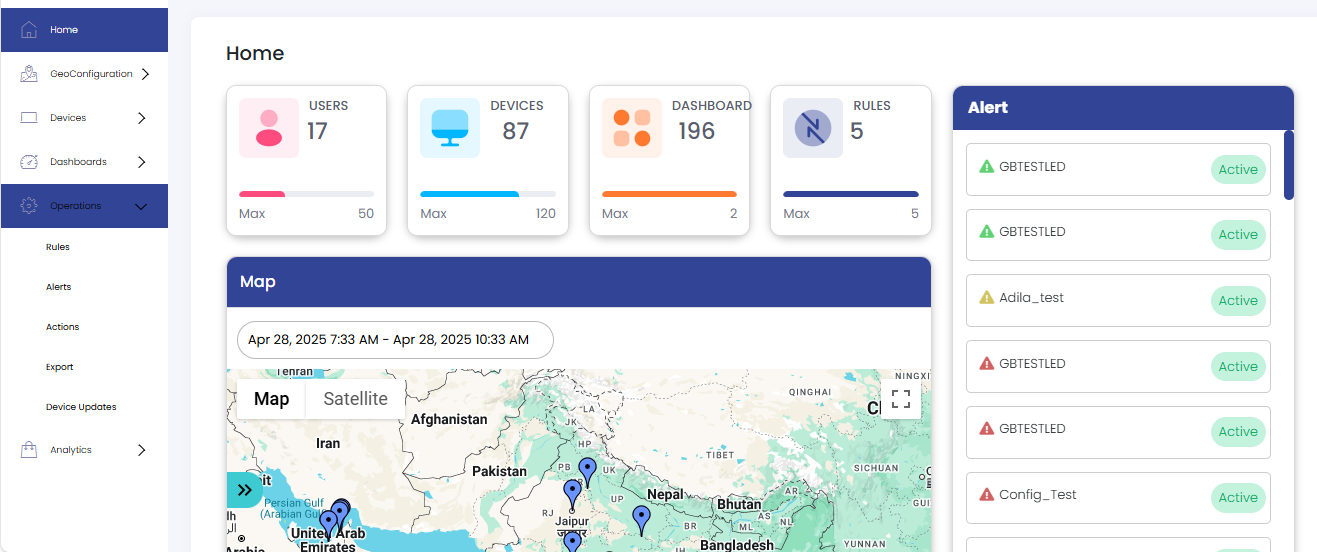
Step 1 : Open the Operations component from the sidebar and click on Export.
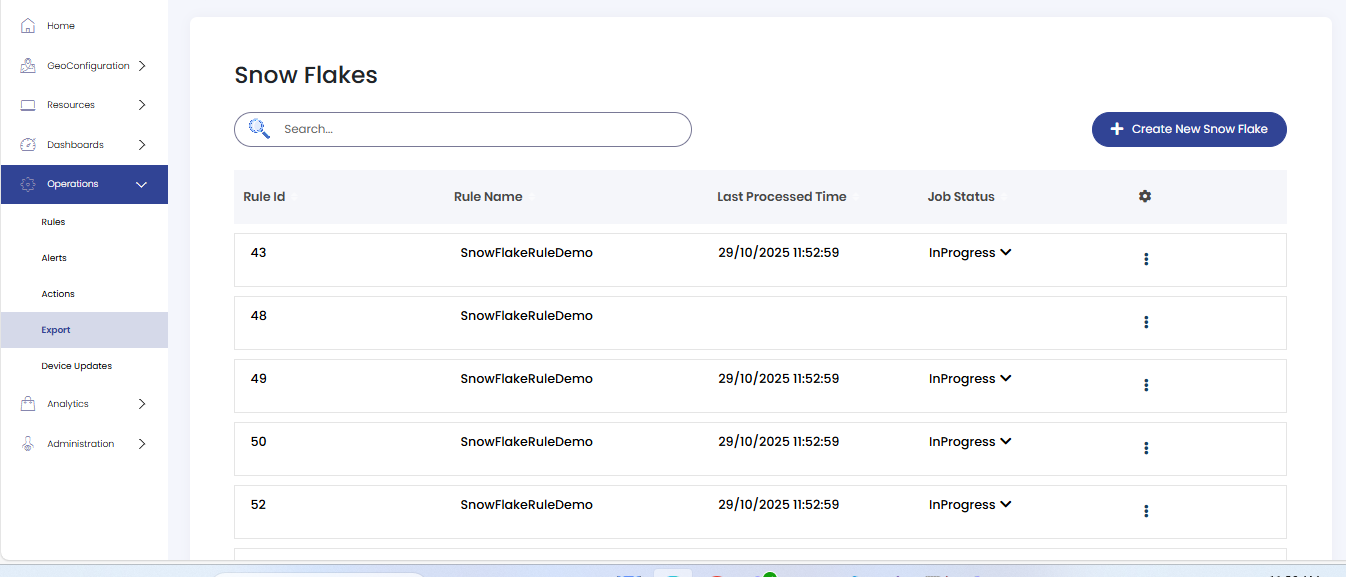
Step 2 : The Snow Flakes page will open, displaying a list of all existing Snowflake rules. Each rule shows the Rule Id, Rule Name, Last Processed Time, and Job Status (InProgress, Queued, etc.).
Creating a New Snowflake Rule
Step 3 : Click on the Create New Snowflake button on the Snowflake Rules page.
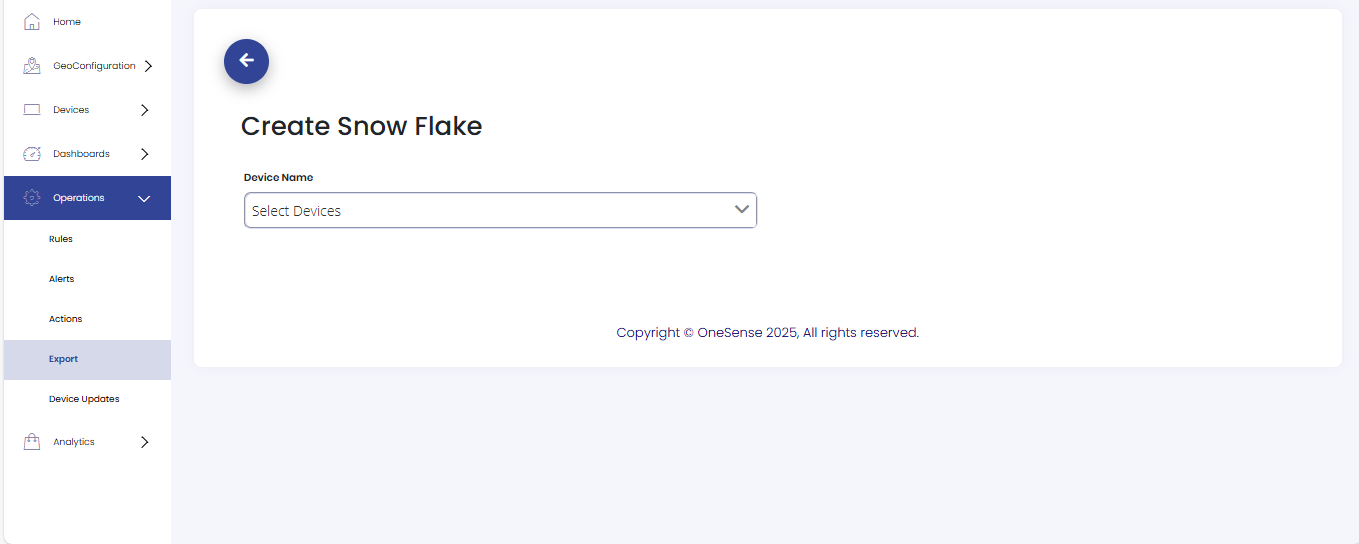
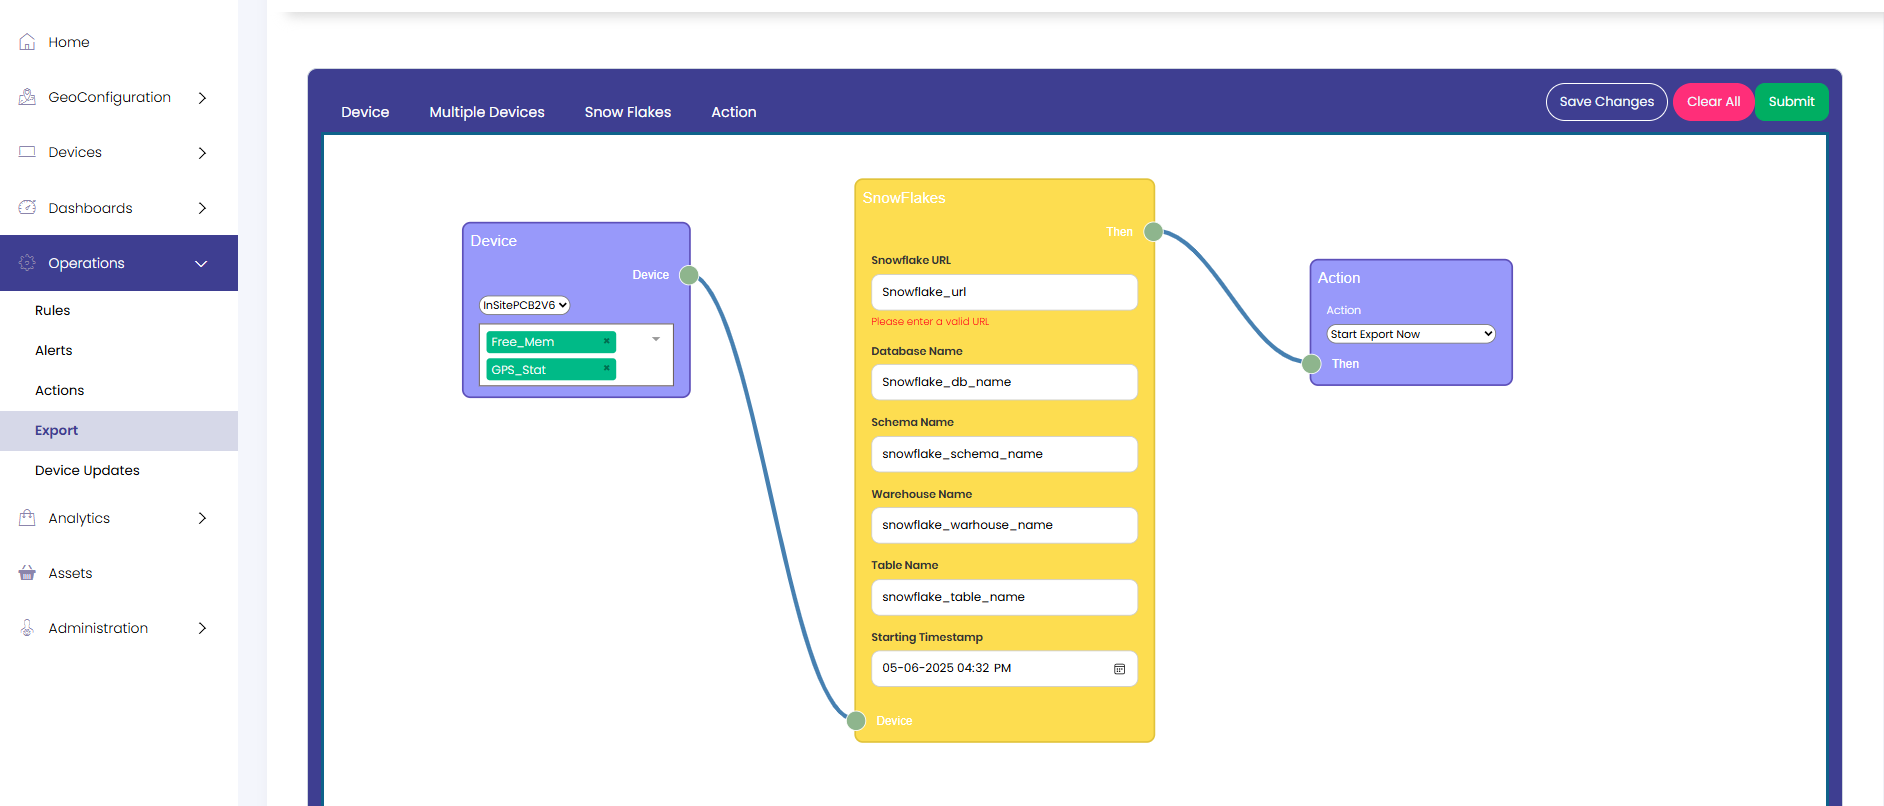
Step 4 : Select the devices you want to export. After selecting devices, a control box will appear with Device, Multiple Devices, Snowflake, and Action controls to configure the rule.
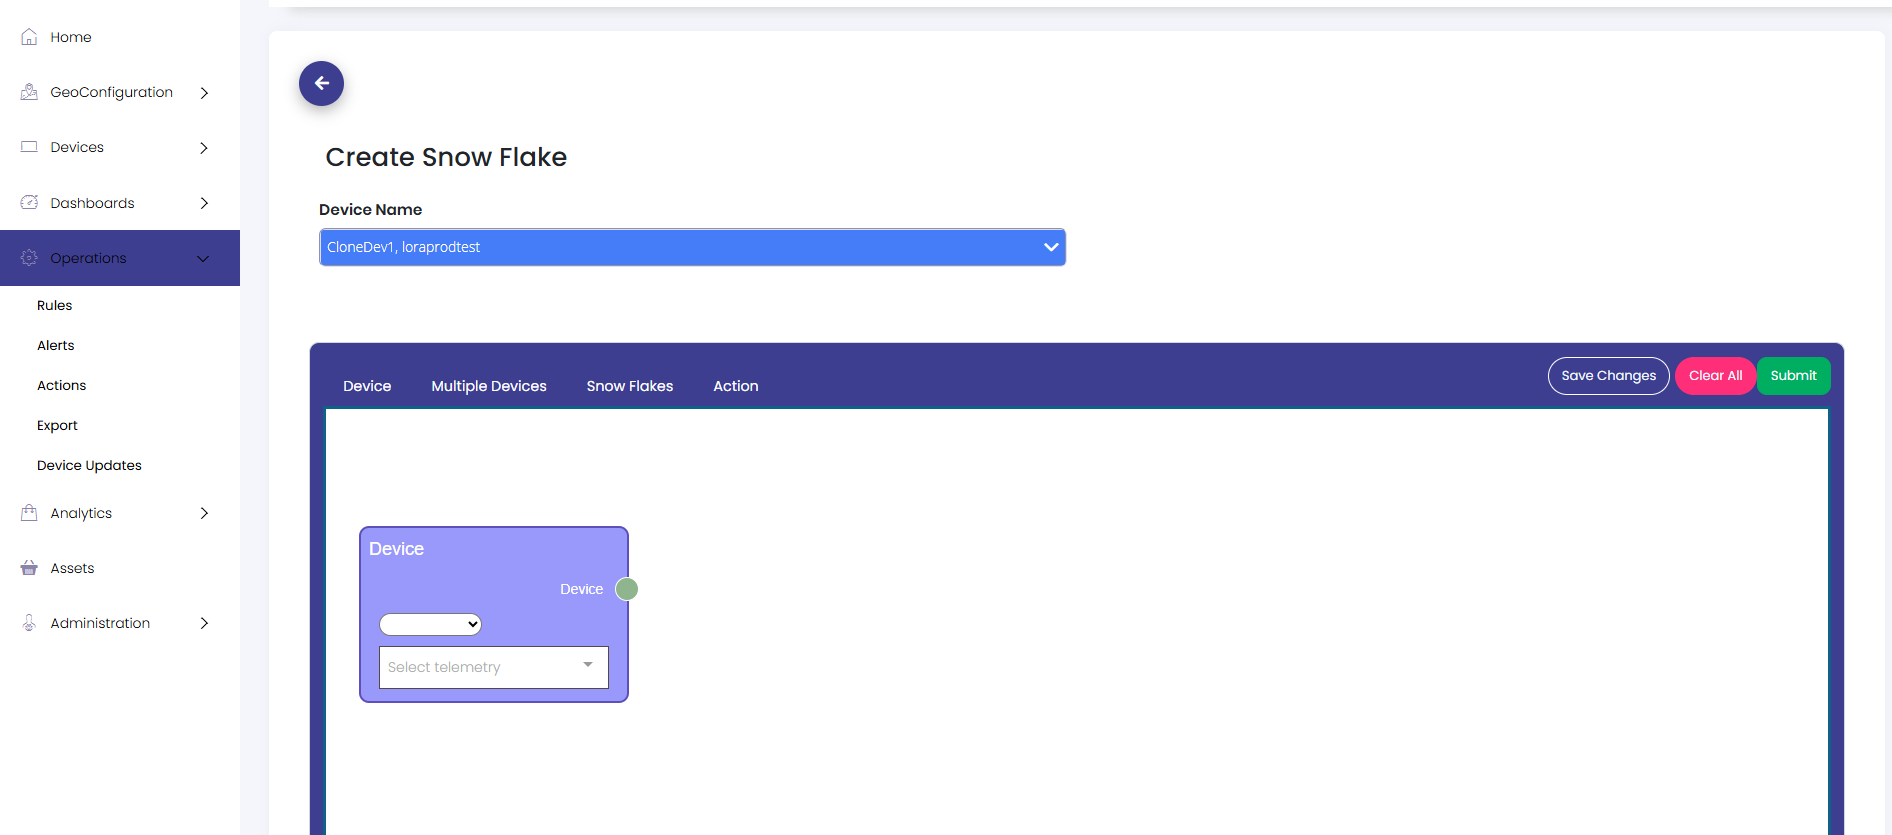
Step 5 : Fill in the Snowflake rule details:
- Select the Device and relevant Telemetries to be exported.
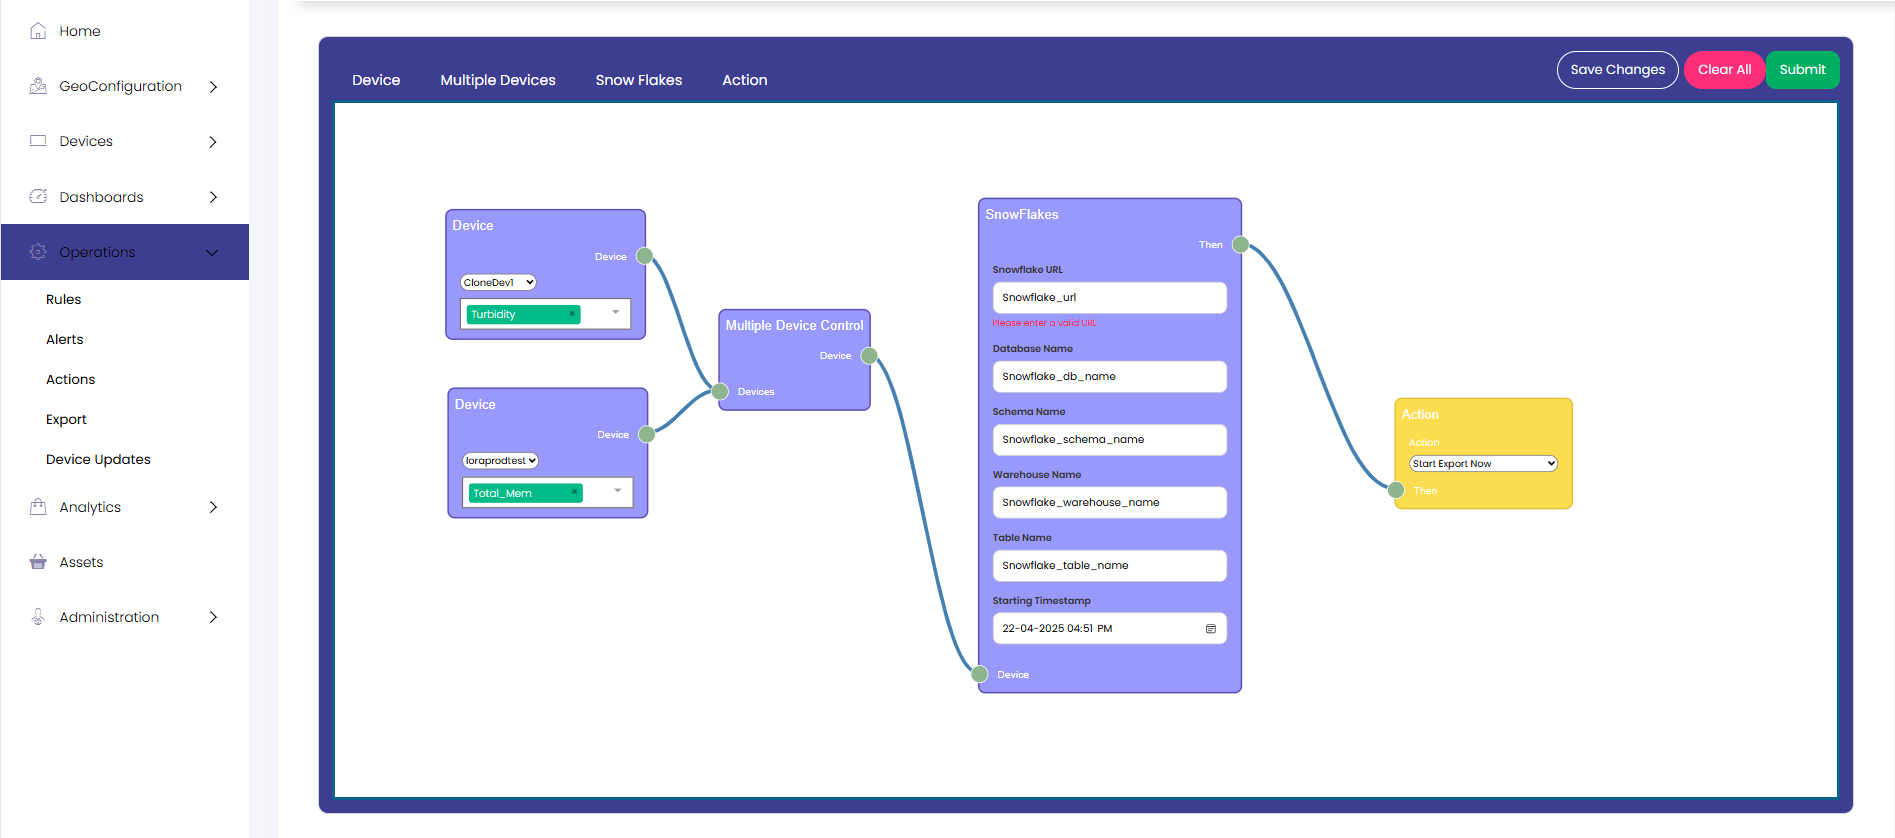
- If multiple devices are selected, choose the Multiple Devices option to group them.
- Configure the Snowflake export settings (such as database, schema, table, etc.).
- Add an Action to determine whether the export should start immediately or later.
Multiple Devices Grouping
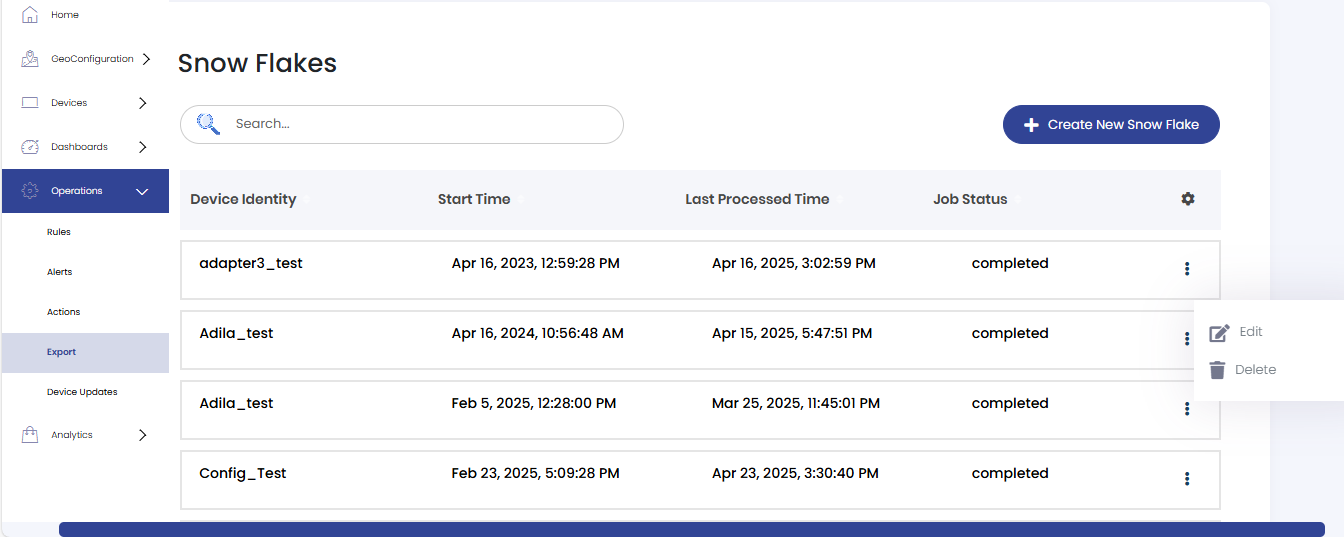
Editing or Deleting a Snowflake Rule
Step 6 : To edit or delete a Snowflake rule, navigate to the Snowflake Rules page. Click on the settings (three dots) for the desired rule and select Edit or Delete.
Running and Managing Snowflake Rules
Step 7 : To start exporting data for a created rule, navigate to the Snowflake Rules page. Click on the settings (three dots) for the desired rule and select Start. This will begin the export process for that rule.
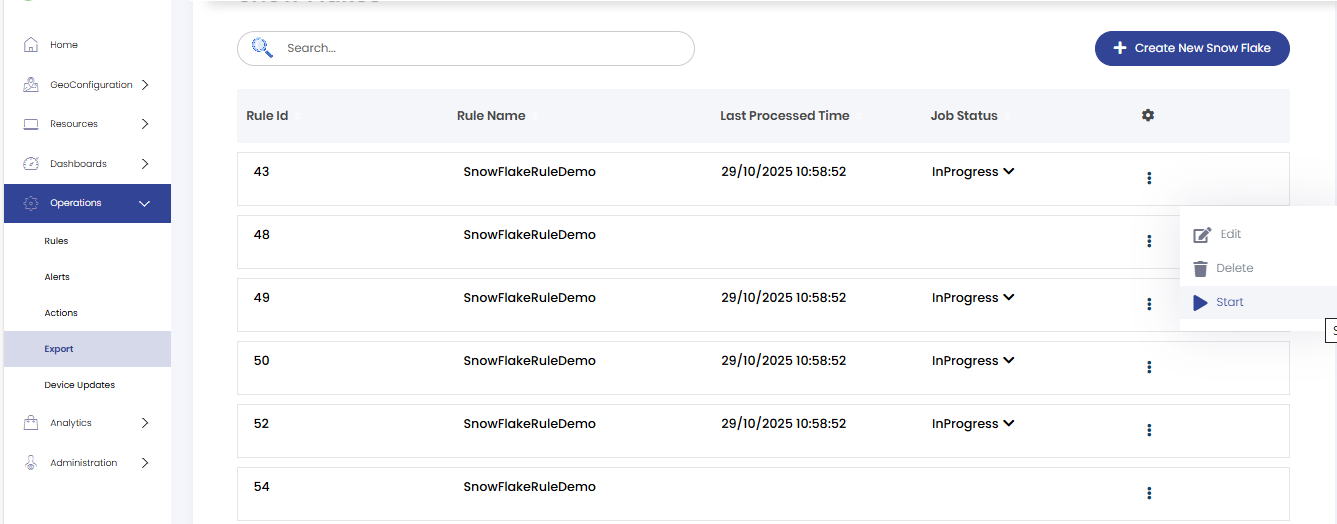
Step 8 : To monitor the export progress, expand the Job Status of the rule. This will display detailed information including the Job ID, Last Execution Time, and current execution status.
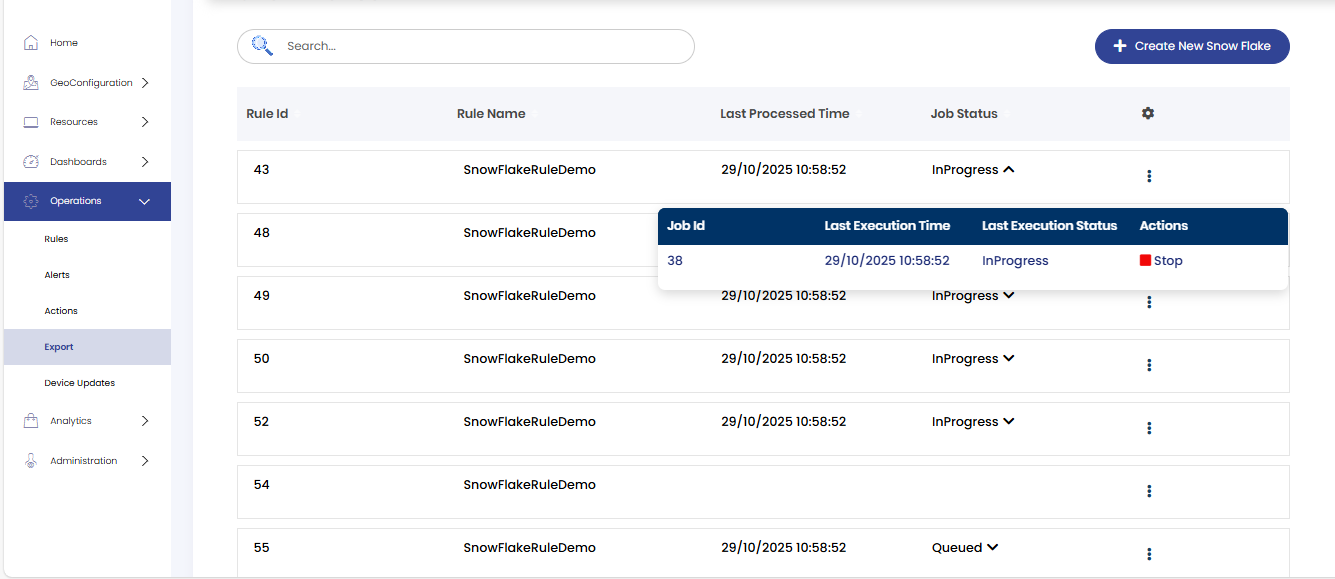
Step 9 : To stop an ongoing export, expand the Job Status and click on the Stop button under the Actions section. This allows you to start and stop Snowflake exports at any time as needed.