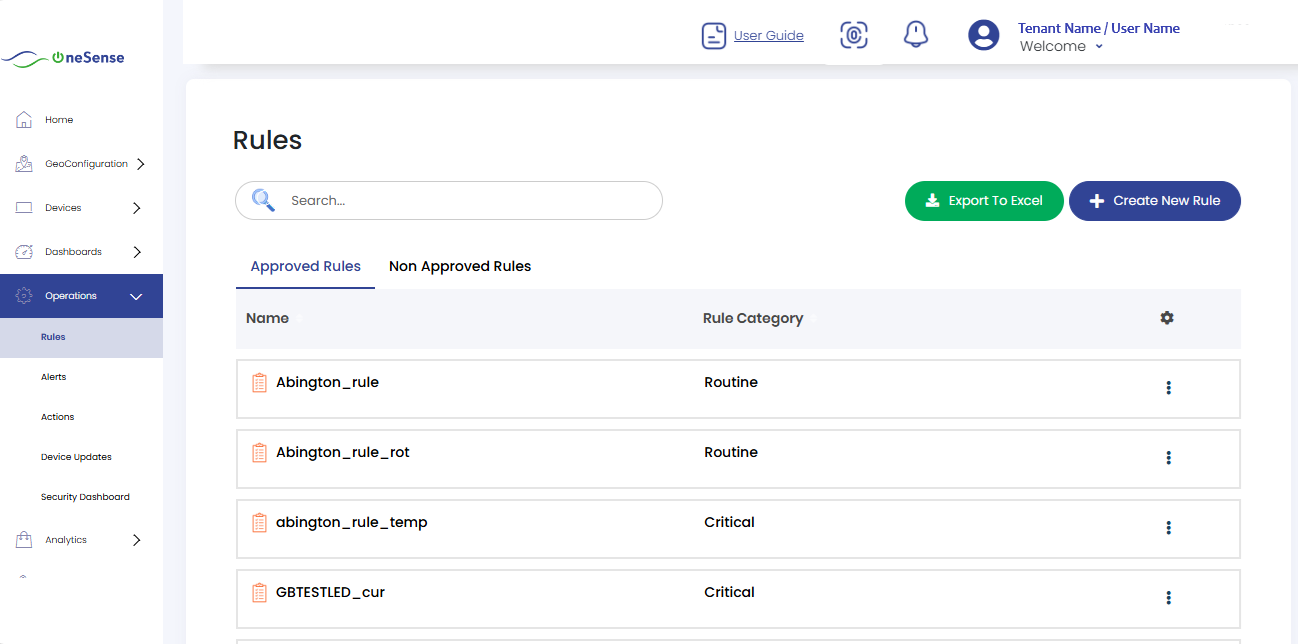
Rules
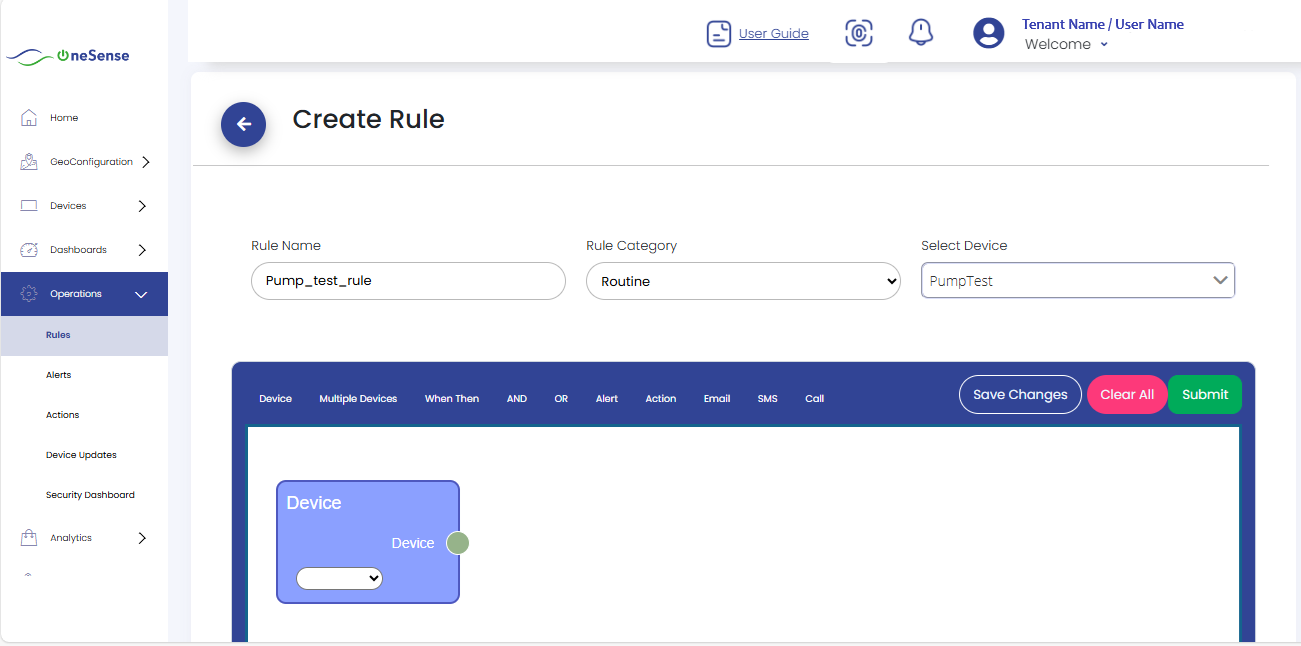
Creating Rule

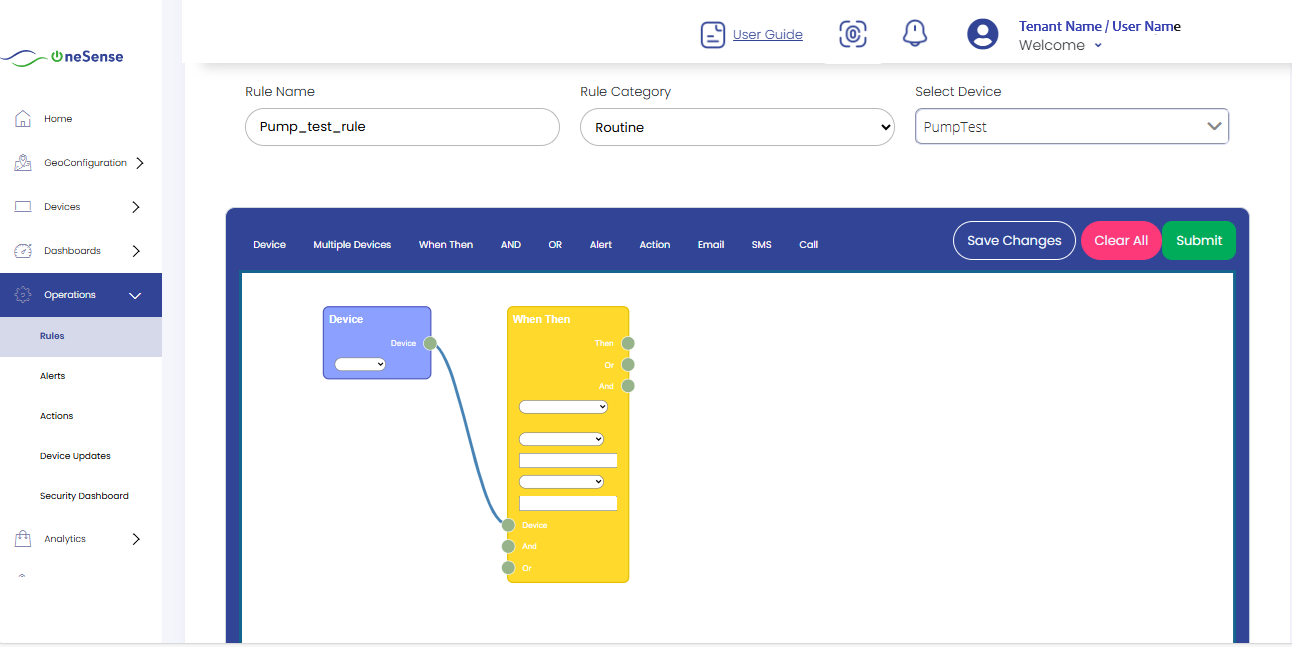
- Select a parameter (e.g., Temperature, Current) from the dropdown list.
- Select an operator (e.g., equals, greater than, less than).
- Enter a numerical value to define the condition limit.
- (Optional) Add another condition by repeating steps 2 and 3 for the same parameter.
Example: If Parameter Name is Humidity, the operator is "Greater Than", and the limit is 40, the condition created is "Humidity > 40".
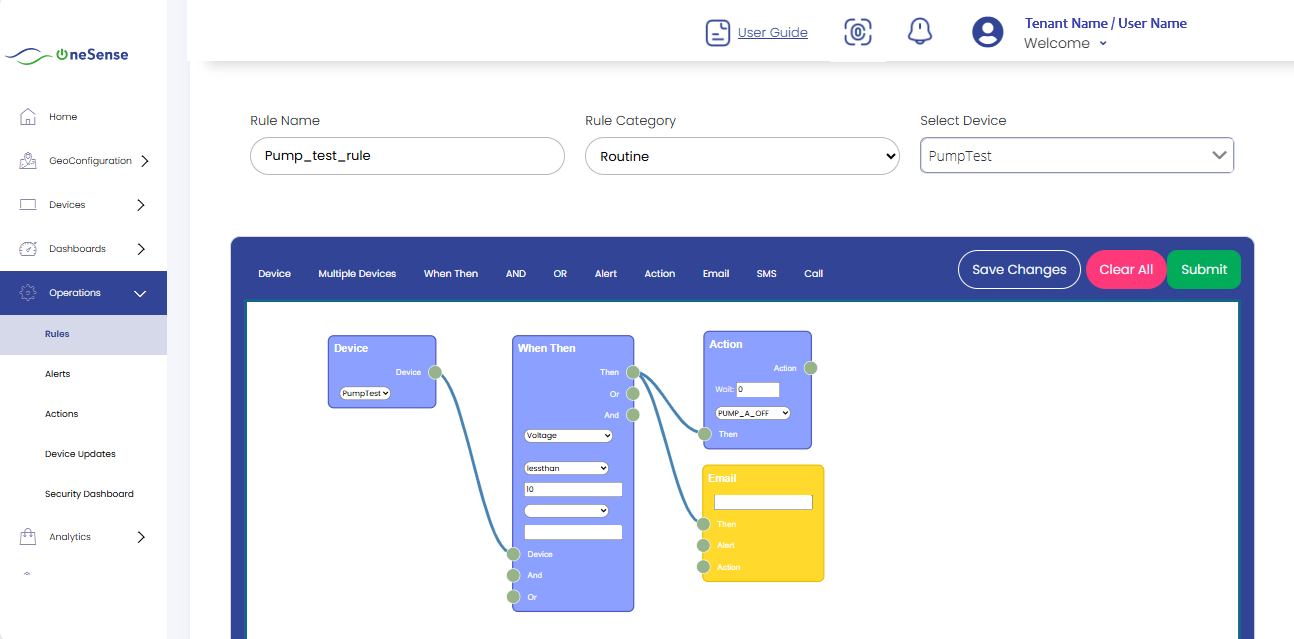
Creating a Rule Using Email
Click on "Email" from the control panel, drag it next to "When Then", and connect them as shown below.
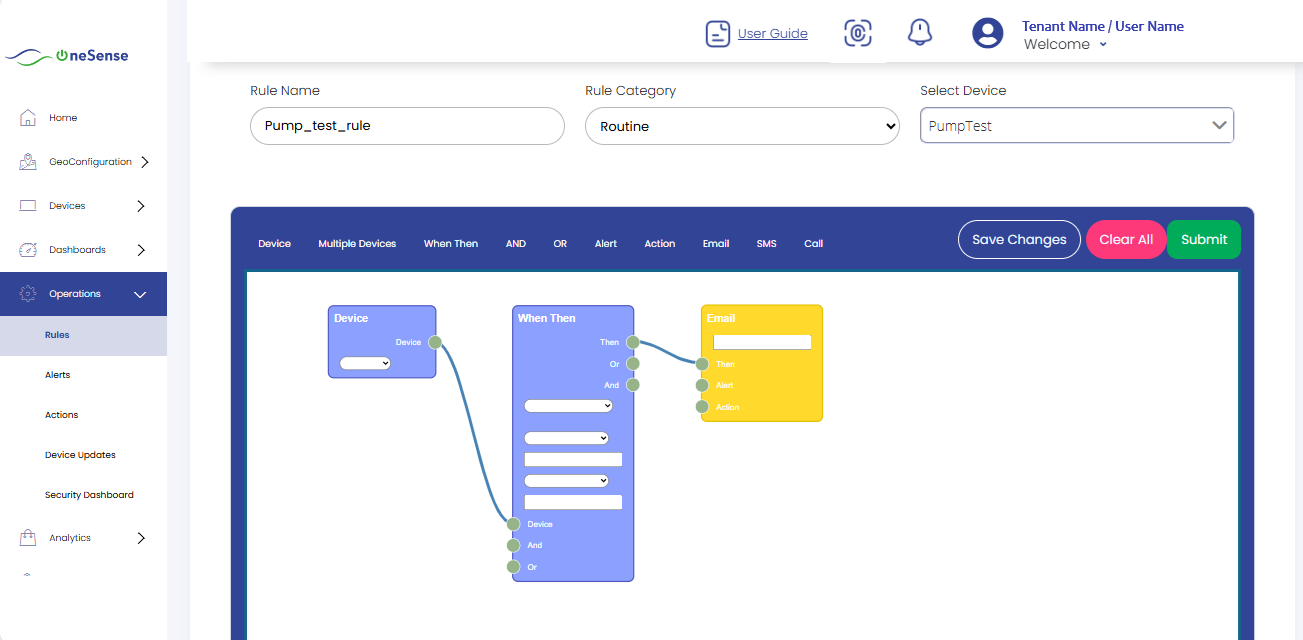
Enter your email address in the Email section.
If the conditions set in Step 5 are met, an email will be triggered.
Click "Save Changes" and then "Submit."
Find your rule under "Non-Approved Rules" and select "Approve" from the settings dropdown list on the right side of the screen.
Creating a Rule Using Action
Click on "Action", drag it next to "When Then", and connect them as shown below.
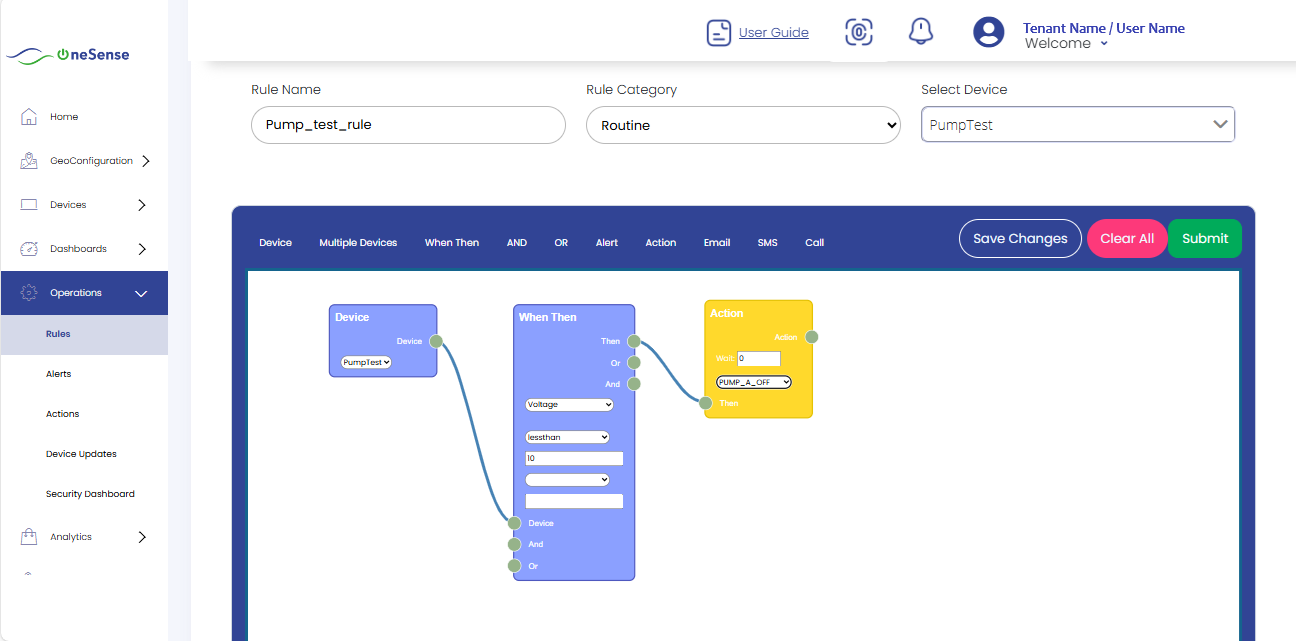
Select an action name from the list.
If the conditions from Step 5 are met, the selected action will be triggered.
Click "Save Changes" and then "Submit."
Find your rule under "Non-Approved Rules" and select "Approve" from the settings dropdown list on the right side of the screen.
Using Both Email and Action
We can combine the steps for adding Email functionality and Action functionality when creating rules to achieve both functionalities together.
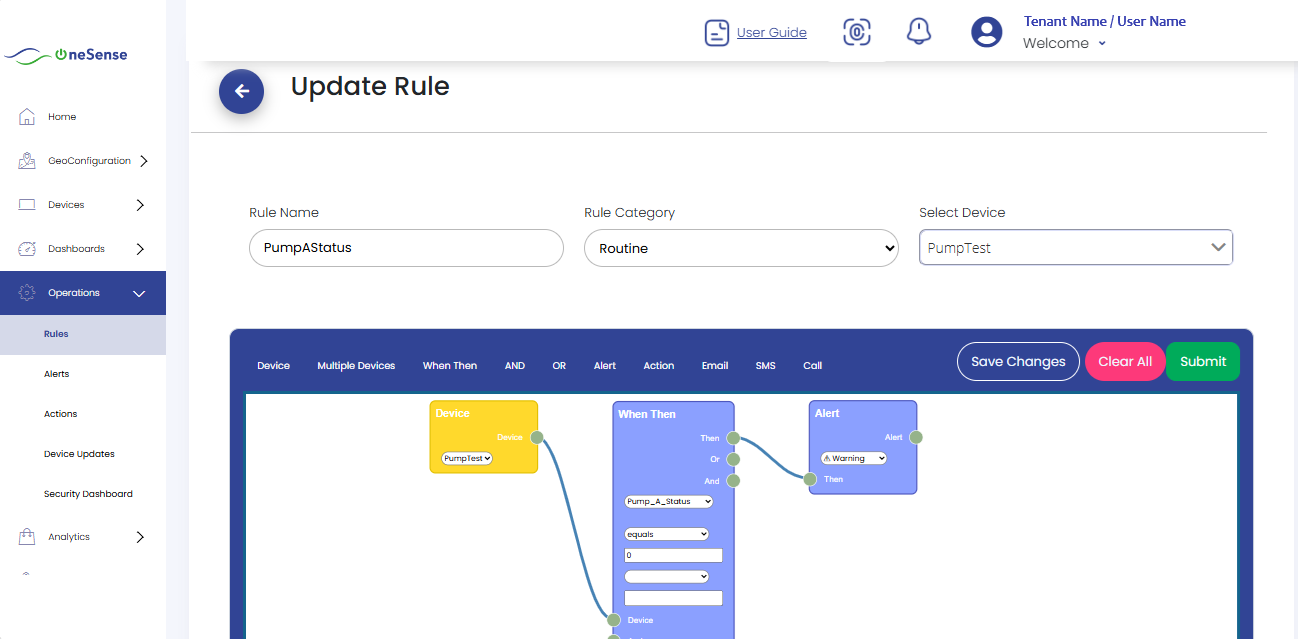
Editing a Rule
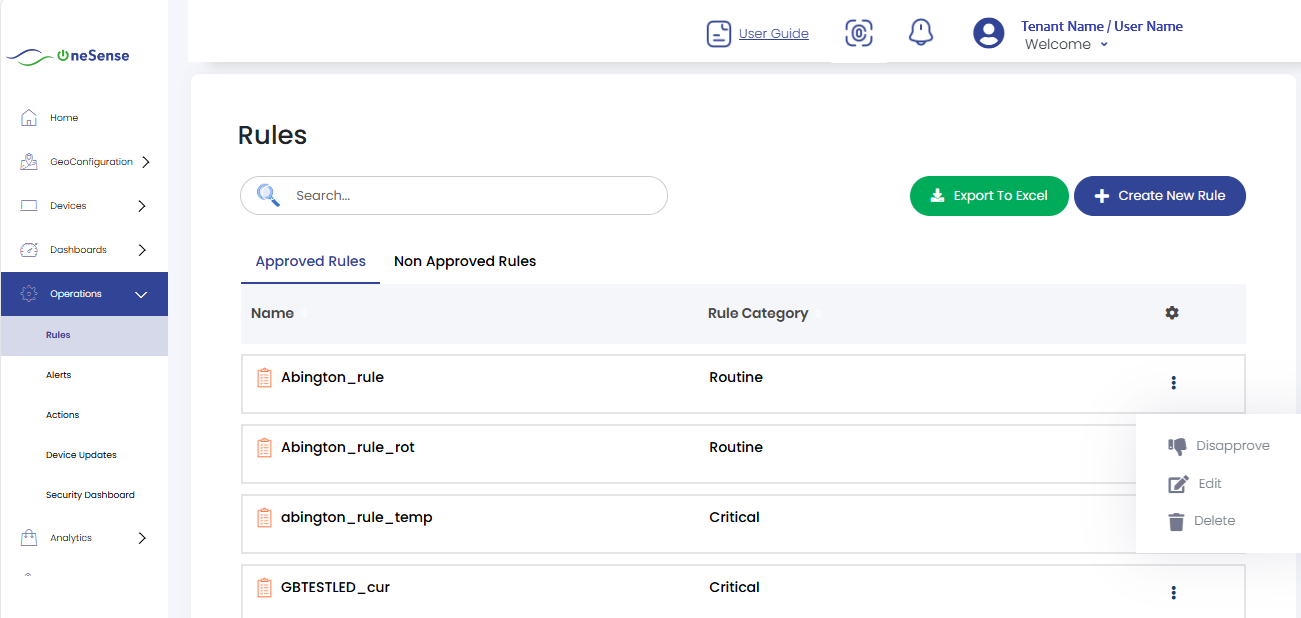
To edit a rule, click on "Edit" from the settings dropdown in the rule section.
Modify the required fields and settings.
Click "Save Changes" and then "Submit."
Find your rule under "Non-Approved Rules" and select "Approve" from the settings dropdown list on the right side of the screen.
Deleting a Rule
To delete a rule, navigate to the rule settings and click on "Delete" from the settings dropdown.
Confirm the deletion when prompted. Once deleted, the rule will no longer appear in the list of active rules.