Sliding Window Rule
Creating Sliding Window Rule

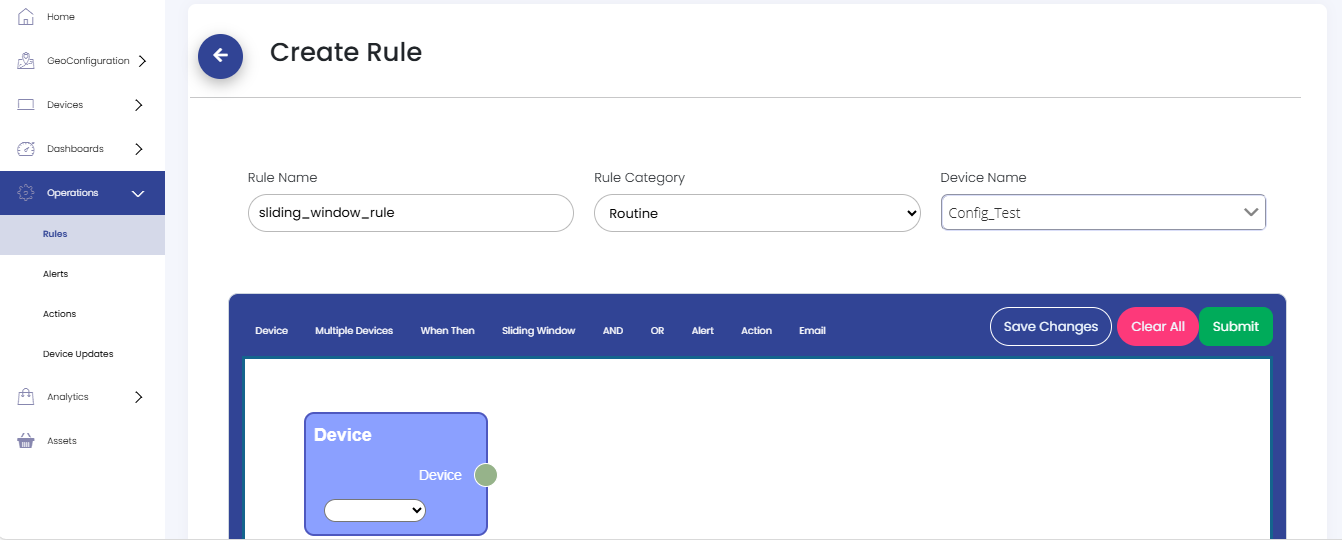

- Select parameter name (like Temperature, Current, etc.) from the dropdown list.
- Select an operator (like equals, greater than, less than, etc.) from the dropdown list.
- Specify the threshold value to define the limits for the selected operator.
Example: If Parameter Name is Humidity, the operator is Greater Than, and the limit is 40, the condition created is "Humidity > 40".
Creating Rule using Email
Click on Email from the above controls, and place it besides "Sliding Window" and connect them from Sliding Window’s output, "Then" terminal to Email’s input's "Then" terminal as shown below.
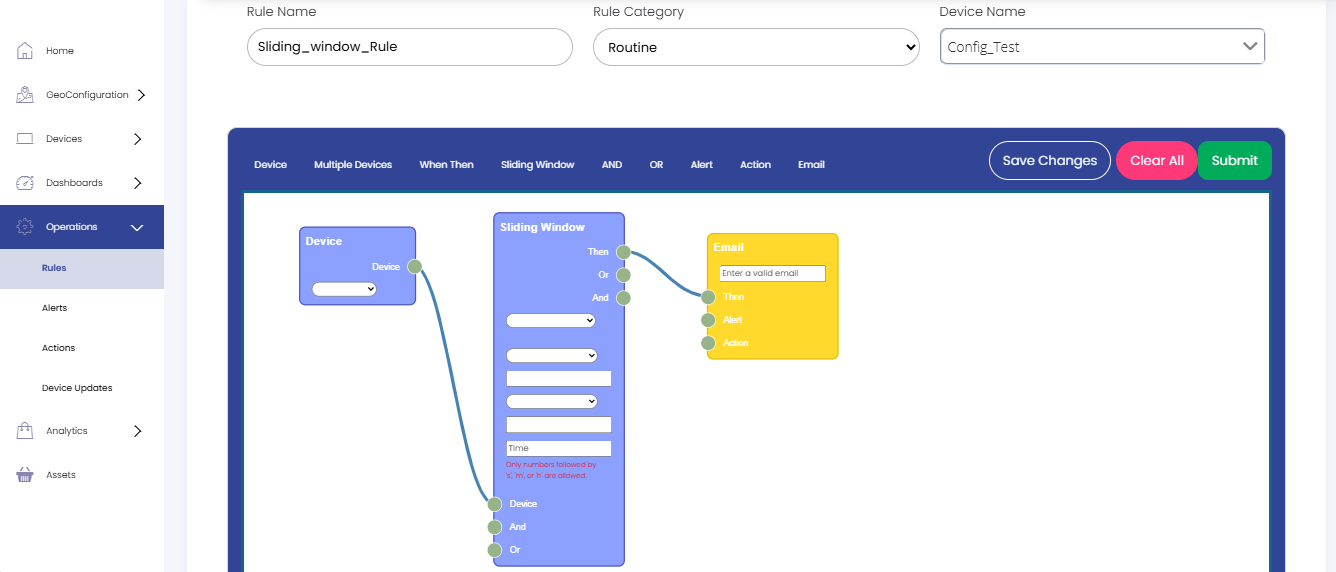
In Email section give your Email id.
Now if Conditions(given in 5th step) are met you will receive an Email.
Now click on the Save Changes button And then click on submit button.
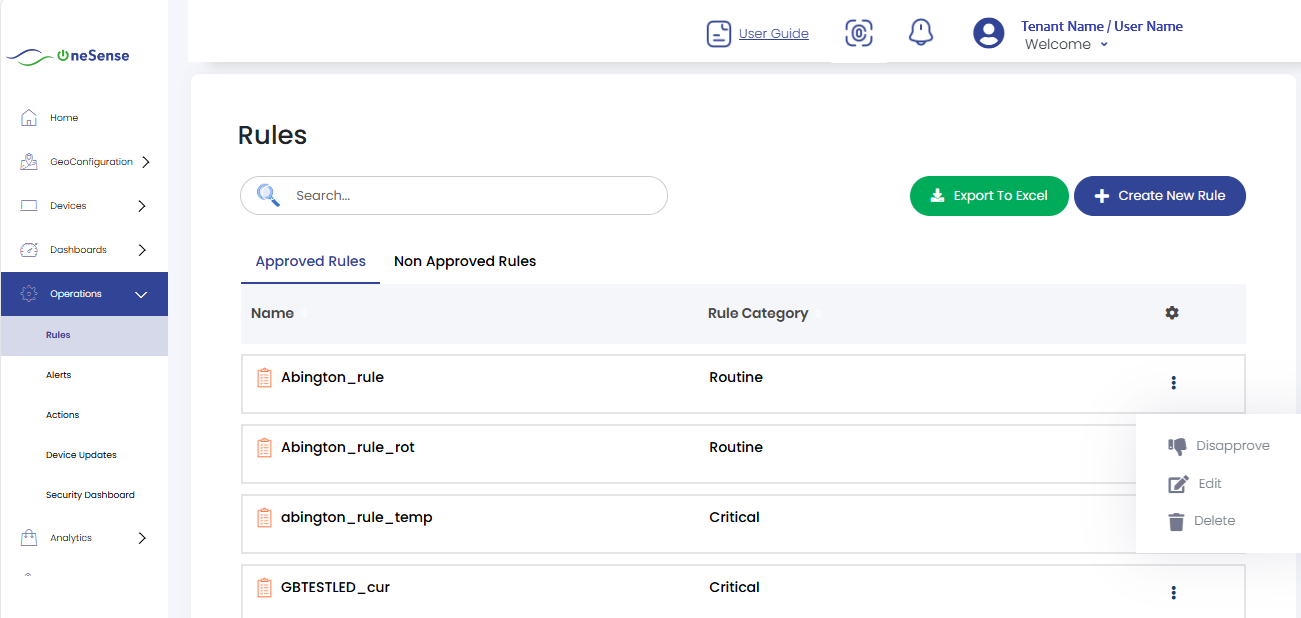
You will be redirected to 1st step, click on Non Approved Rules and find your rule and Select Approve from the setting drop down list on the right side of the screen.
Creating Rule using Action
Click on Action from the above controls, and place it besides "Sliding Window" and connect them from Sliding Window’s output "Then" terminal to Action’s input "Then" terminal as shown below.
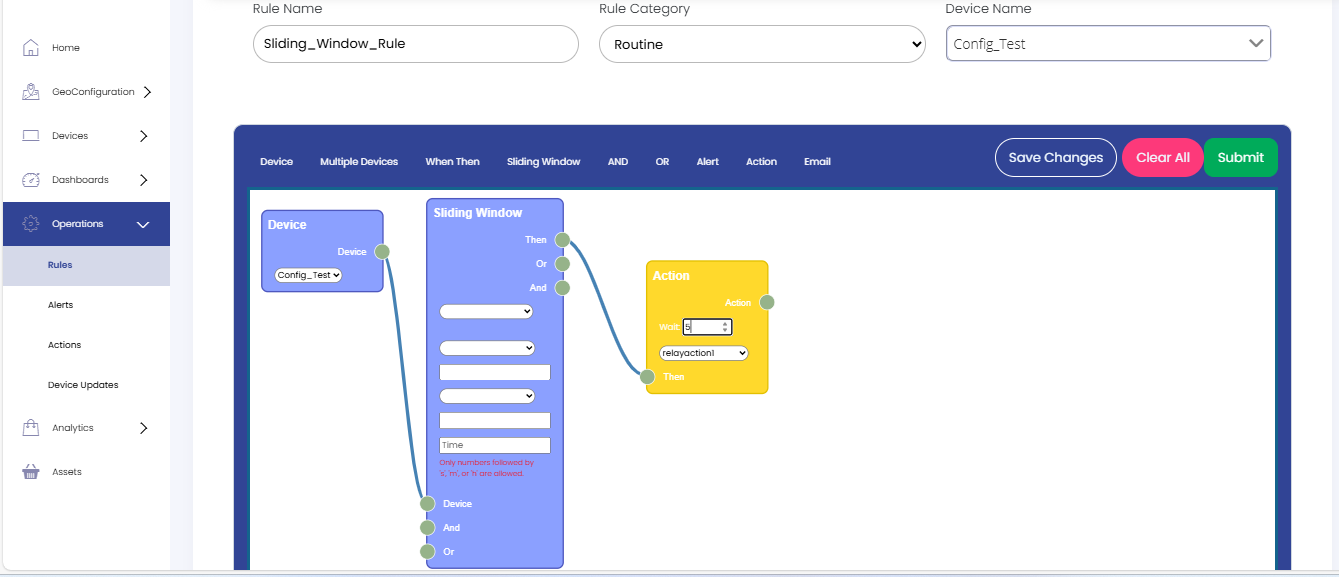
In Action select an Action name from the list.
Now if conditions (given in 5th step) are met that Action will be called.
Now click on the Save Changes button and then click on submit button.
You will be redirected to 1st step, click on Non Approved Rules and find your rule and Select Approve from the setting dropdown list on the right side of the screen.
Using both Email and Action
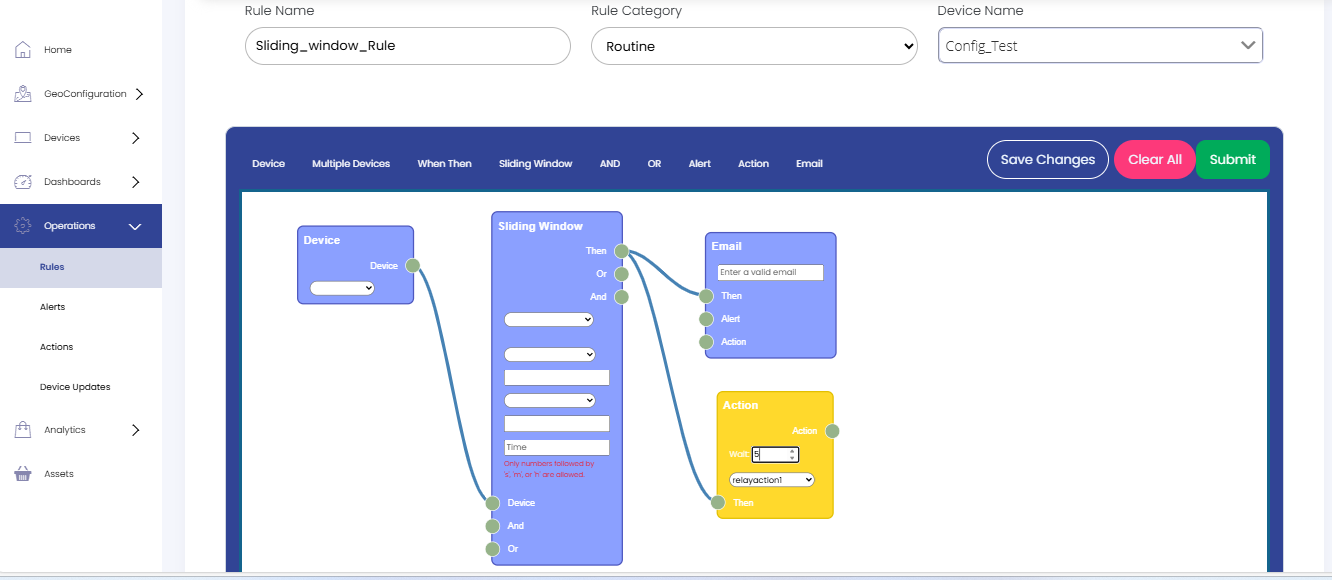
We can combine the steps for adding Email functionality and Action functionality when creating rules to achieve both functionalities together.
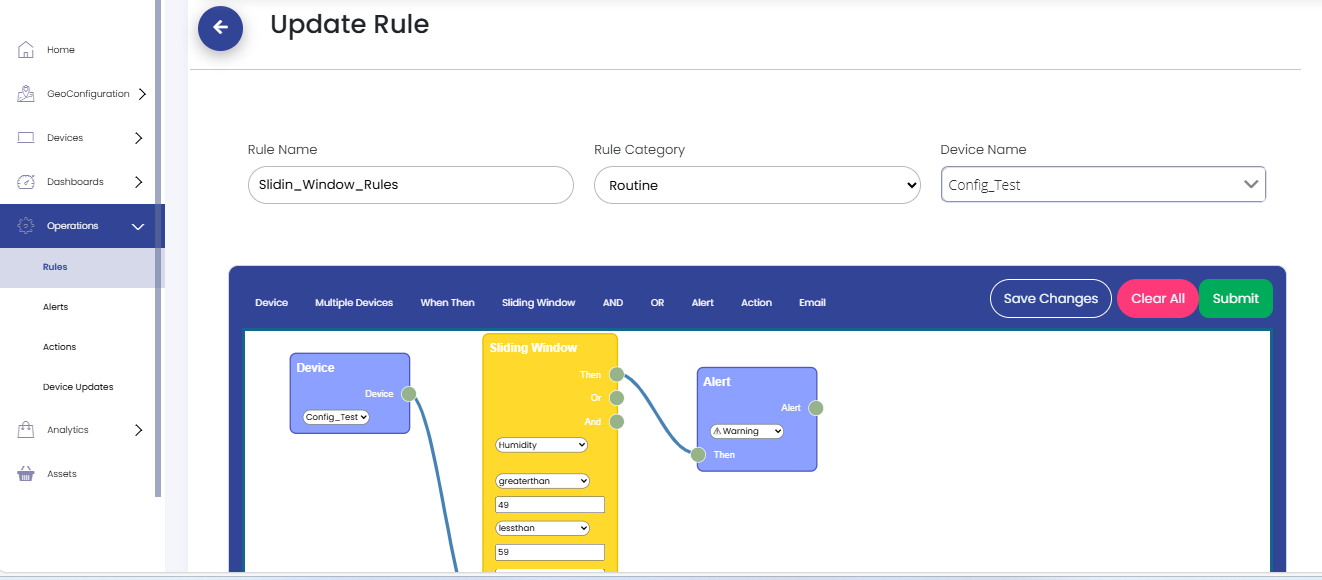
Updating Sliding Window Rule
To update a Sliding Window rule, click on "Edit" from the settings dropdown to access the rule settings.
The window that appears allows you to make the necessary modifications.
Enter the updated rule name in the designated field.
Select the appropriate rule category and device from the provided lists.
Adjust the time period or conditions in the Sliding Window module as needed.
After making the desired changes, click on the "Save changes" button to save the updated rule settings. Once you have saved the changes, click on the "Submit" button to finalize and apply the updated rule.
Find your rule under "Non-Approved Rules" and select "Approve" from the settings dropdown list on the right side of the screen.
Deleting Sliding Window Rule
To delete a Sliding Window rule, navigate to the rule settings and click on "Delete" from the settings dropdown.
Confirm the deletion when prompted. Once deleted, the rule will no longer appear in the list of active rules.