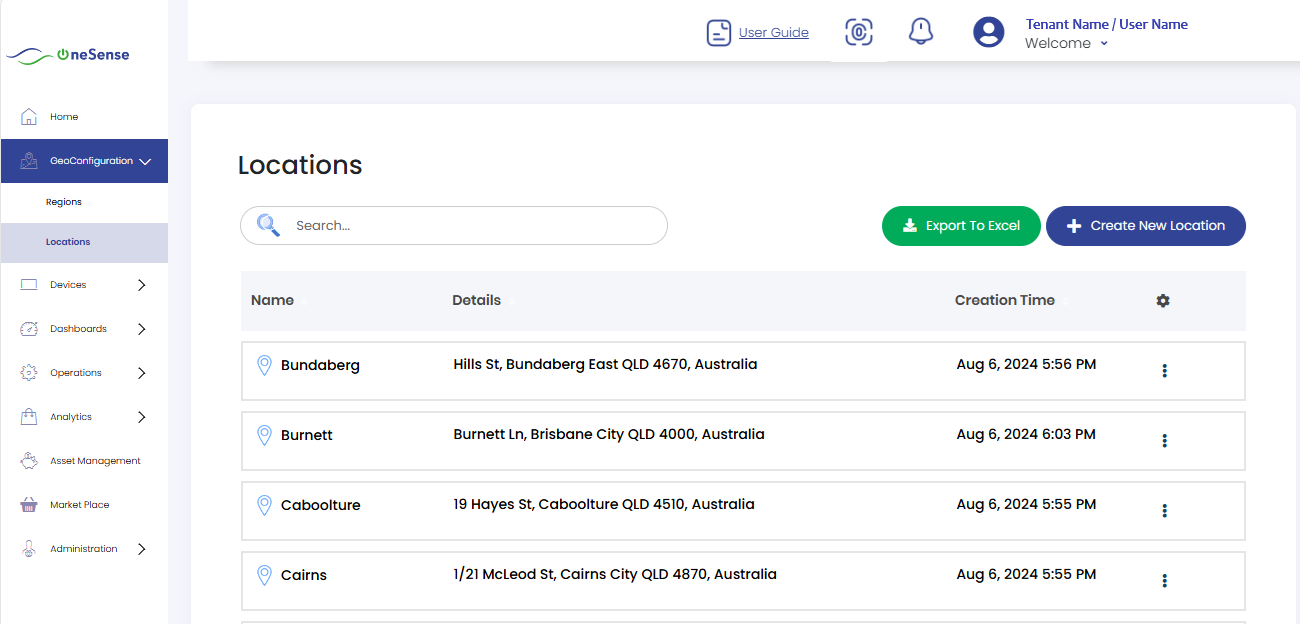
Locations
 Allows you to view and manage the different locations associated with your devices. You can access details about specific locations, add new locations, or modify existing ones.
The location hierarchy in the OneSense platform follows a structure where you have regions containing locations, locations containing devices, and devices housing sensors, That is the flow.
Each region is associated with a location. A location represents a broader geographical or physical area. It could be a city, a building, a campus, or any other defined area where devices and sensors are deployed.
Within each location, there are multiple devices deployed. A device refers to a physical device or equipment that collects data. These devices can be sensors, meters, detectors, or any other data-gathering equipment.
By following this hierarchy, you can organize and manage your devices and sensors based on their respective locations, regions, and the relationships between them. This hierarchical structure allows for efficient data management and enables you to monitor and analyze data at different levels of granularity within the OneSense platform.
Here in the Location section, you will find a list of all previously created and saved Locations. Each Location will have its corresponding Name, Details and Creation Time displayed for easy reference.
On the right side of each Location entry, there is a settings dropdown which provides Edit, Delete and Upload.
View

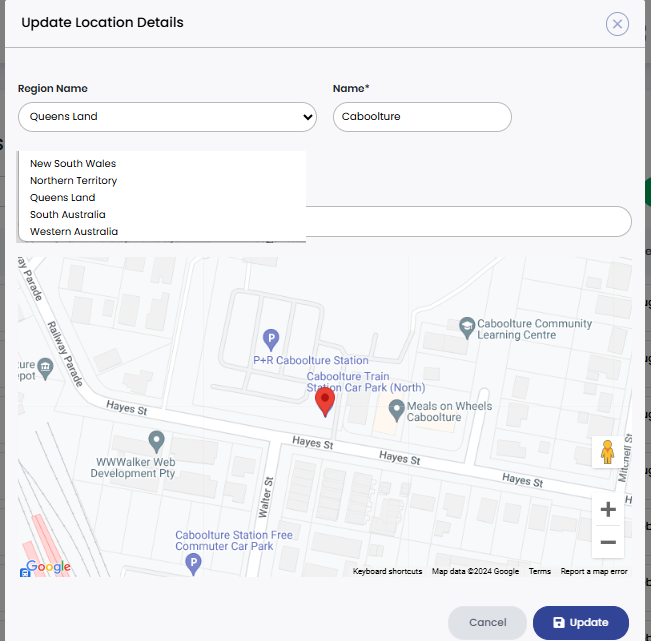
Edit
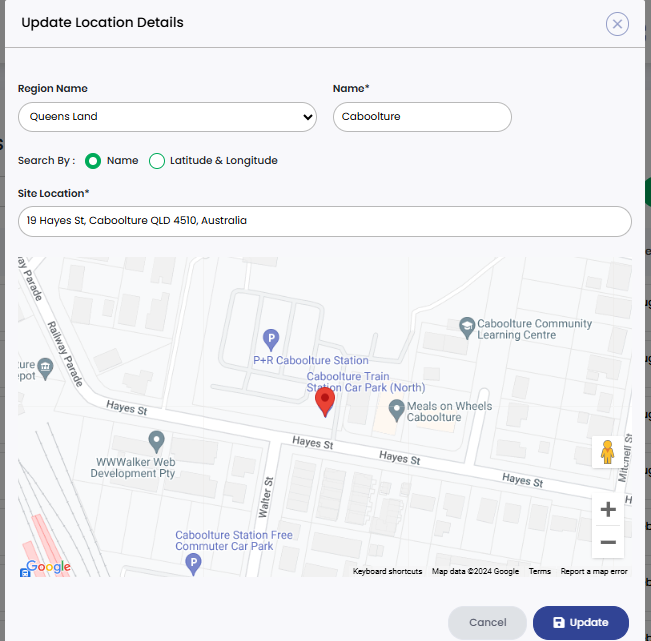
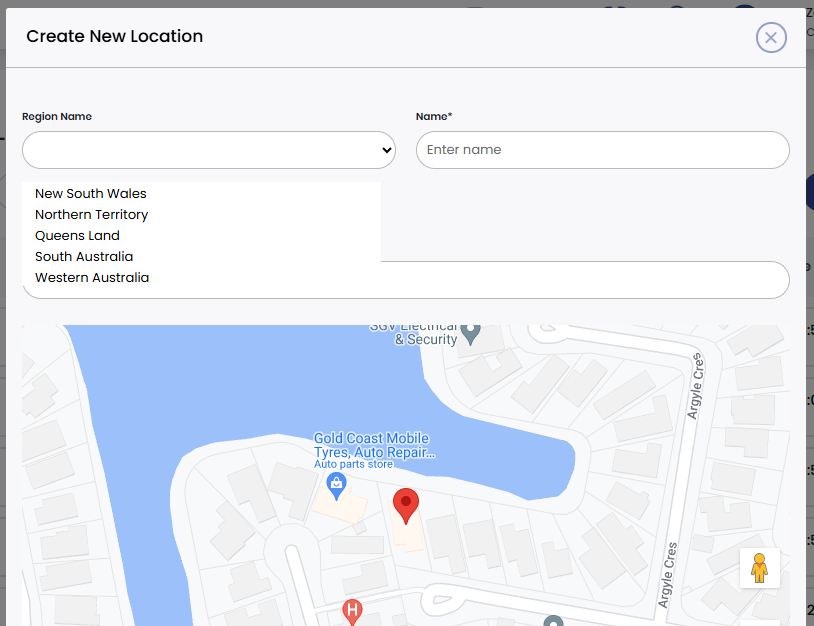
Here you will find a field or dropdown menu where you can select the region name that you wish to edit or update.
Click on the region name field, a list of available options will appear, allowing you to select the desired region for modification.
Select the region name, you can proceed with making changes to the region details such as Name, Site Location associated with that specific region.
After selecting the desired region and making the necessary edits, Click on the "Update" button located at the bottom of the window. You can save and update the changes.
Upload
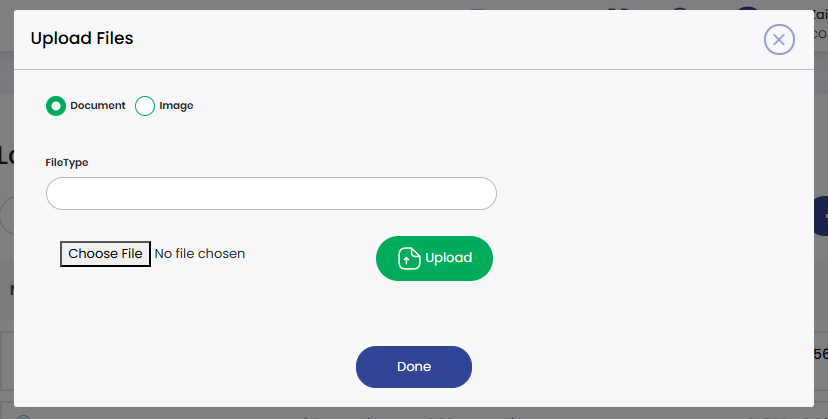
Click on the "Upload", a window will open where you can upload files. In this window, you will be prompted to select the type of file you are uploading, such as a document or an image.
After selecting the file type, you can proceed by clicking on the "Choose File" dropdown. This will allow you to navigate through your machine's directories and select the desired file for uploading. You can choose the file from any location on your machine or any other accessible storage.
Once you have selected the file, click on the "Save" to initiate the upload process. The selected file will then be uploaded and associated with the specific location or region within the OneSense platform.
Create New Location
If you need to create a new location, simply click on the "Create New Location" option. This will open a window that allows you to input the details for the new location.
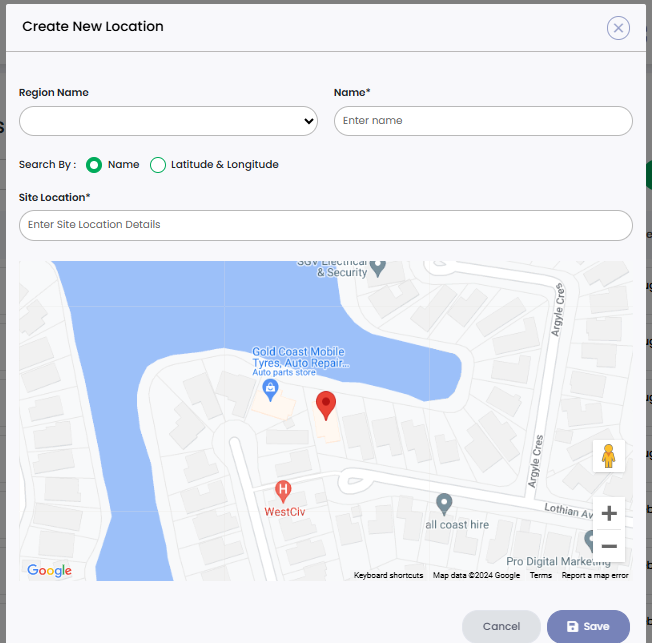
It will open the window similar to the edit window, you can follow the same steps as mentioned for the edit option to create and save the location details.
After filling in the necessary information for the new location, click on the "Save" button to save and apply the created location details. It will store the entered information and create the new location within the system.
Make sure to review the details before saving to ensure accuracy and completeness of the created location. Once saved, the new location will be available for further management and association with devices, regions, and other relevant data within the OneSense platform.